 One of the first participants to arrive for our UFO Exchange had a bag full of hand dyed fabric scraps that immediately caught my eye. Knowing I'd be in the last selection group, I figured they'd already be scooped up by another participant. So when it was my turn, I made a beeline in the off-chance they might still be up for grabs, and as soon as I spotted them, I scooped them up and claimed them as my own!
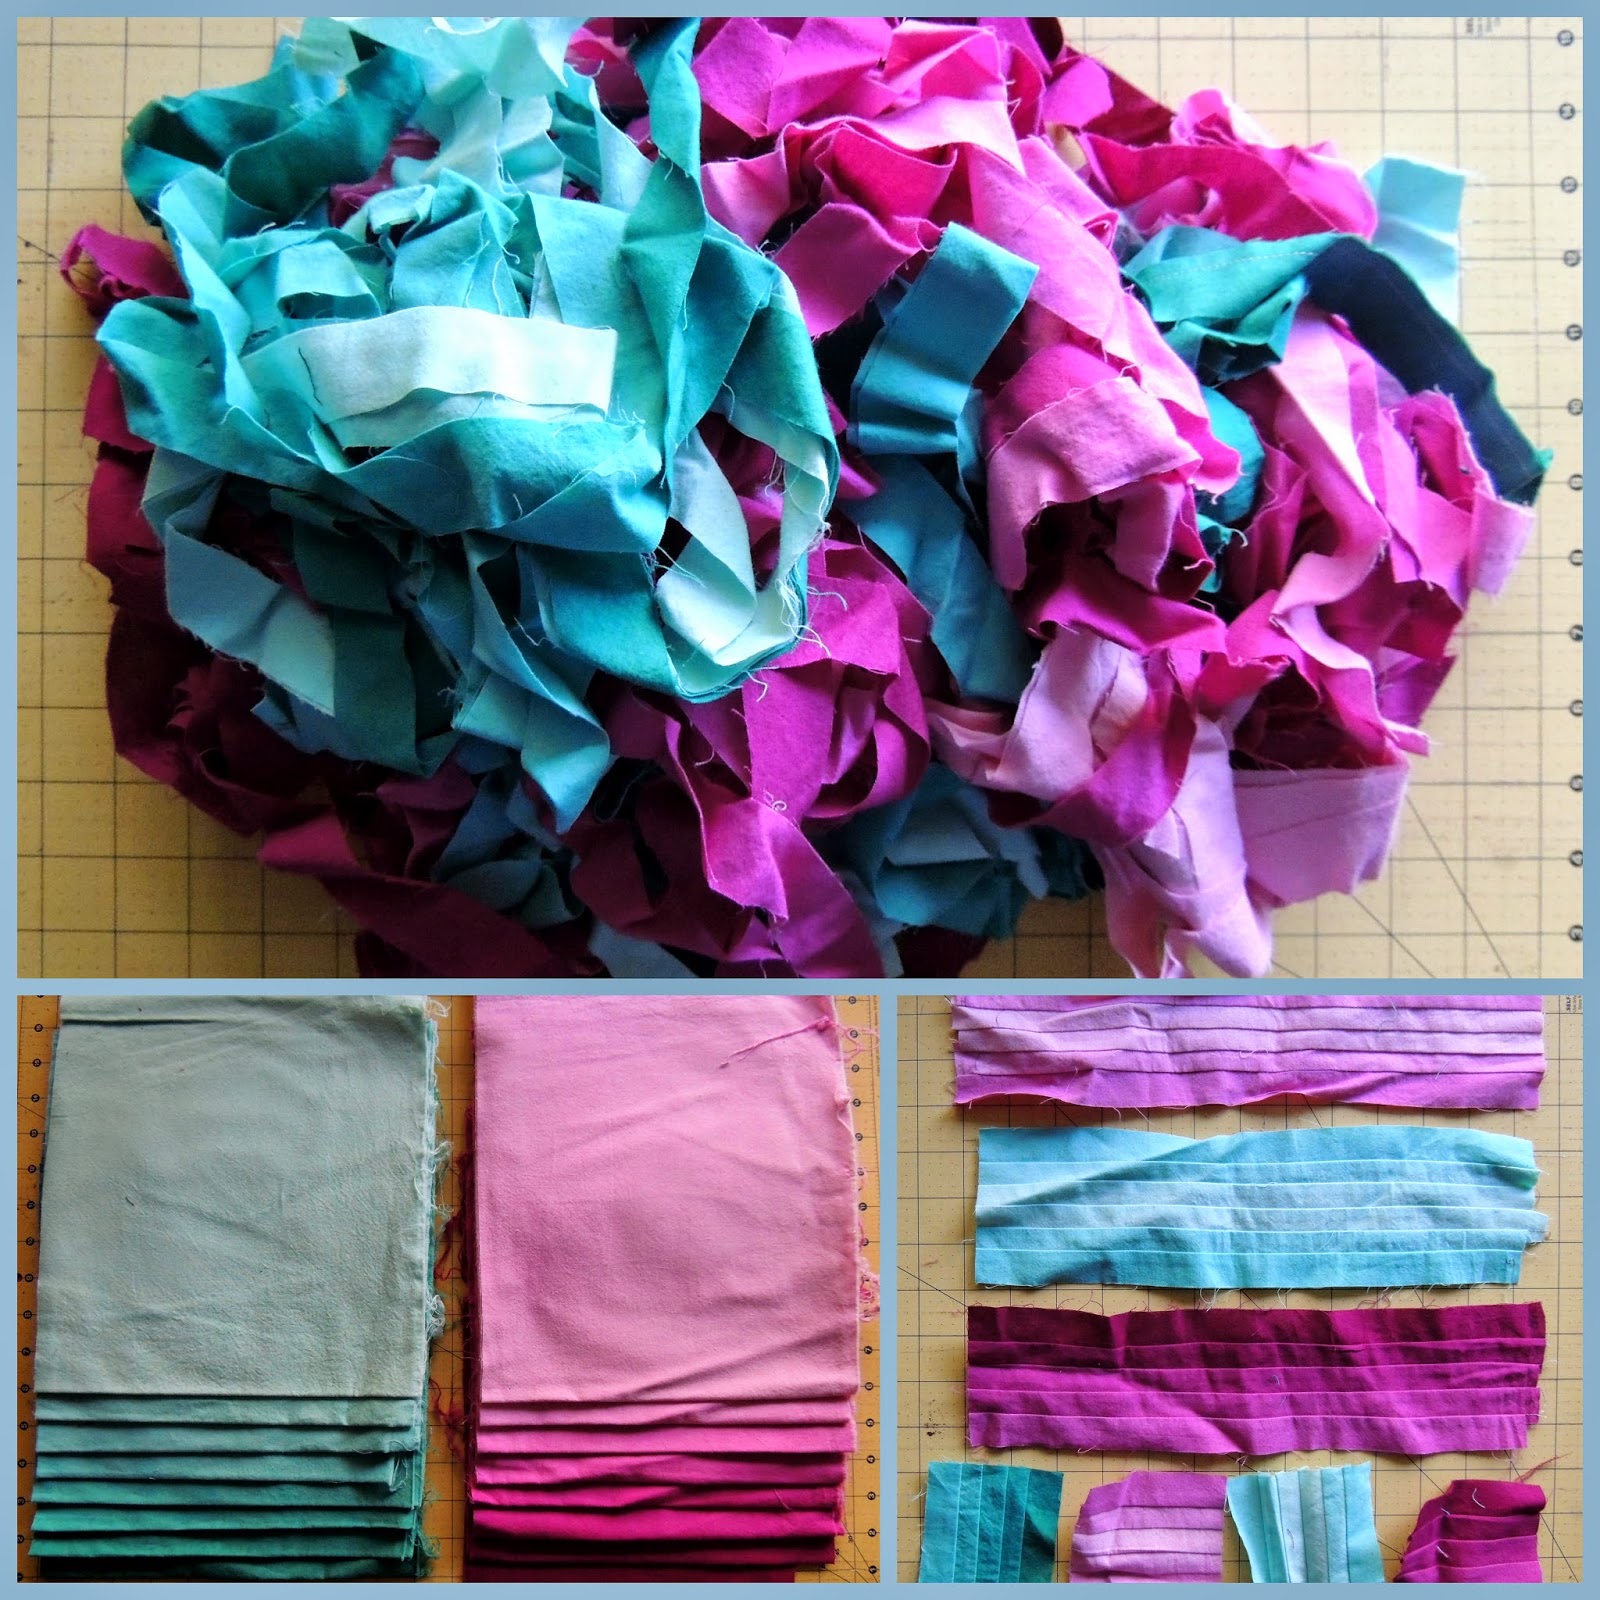
 It wasn't until I got home and unpacked my bundle of scraps that I realized what a treasure trove this UFO contained! First I pulled out the 1" strips and found several strip sets buried inside. And then buried behind all the strips was yardage (almost 1/4 yard in all 8 gradations in both teal and pink!!--so almost 4 full yards of fabric!)
 |
| 1" strips pressed and organized |
Once I pressed all the strips, I realized there were 5-6 strips in each of the 16 colorways--and thankfully my predecessor had already labelled each of the gradations for easy identification!! I decided to challenge myself to see what I could do with the 1" strips. For inspiration, I found loads of inspiration in my book & magazine collection, and of course, Pinterest!! The challenge would be narrowing down which techniques/designs to try first!
Quilt #1: Spinning Borders
I had found one idea on Pinterest and went to work creating a large strip set alternating the gradated hand dyes with black 1" strips to create a large sideways V-shape. But the original inspiration quickly lost appeal, so I went to work slicing the strip set into ribbon blocks to wrap around a center block.
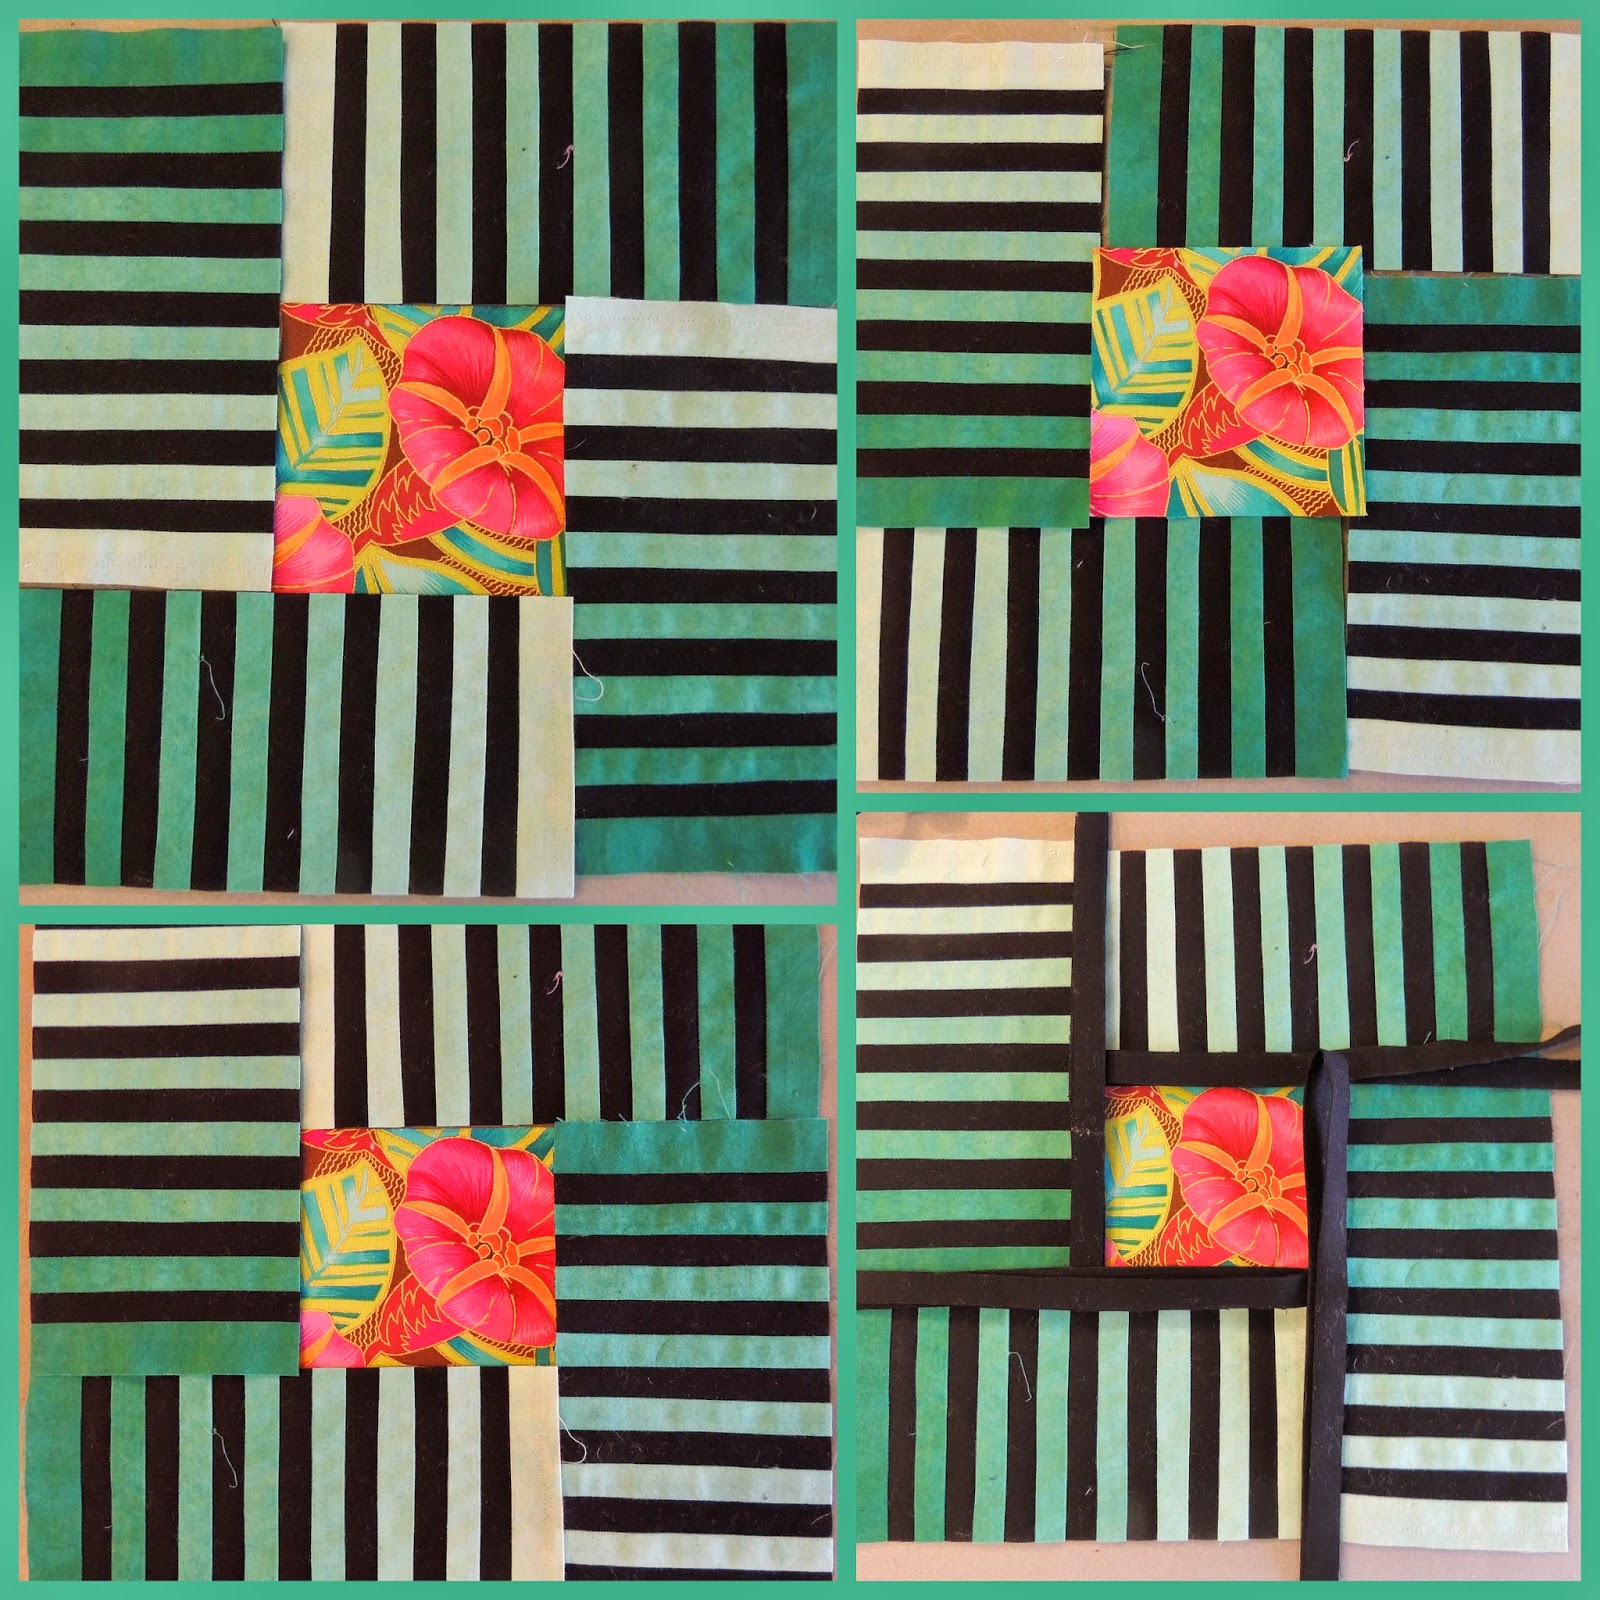 |
| Block layout experimentation |
I played around with the orientation of the strip sets--lighter values towards the center (top left), towards the corners (top right), matching light values in opposite corners and dark values in the other two corners (bottom left) and adding an inner border of black (bottom right). They definitely needed the black inner piping to clearly define the various components. Below are the finished blocks in teal and pink.
 |
| Finished 10" Blocks in Teal and Pink |
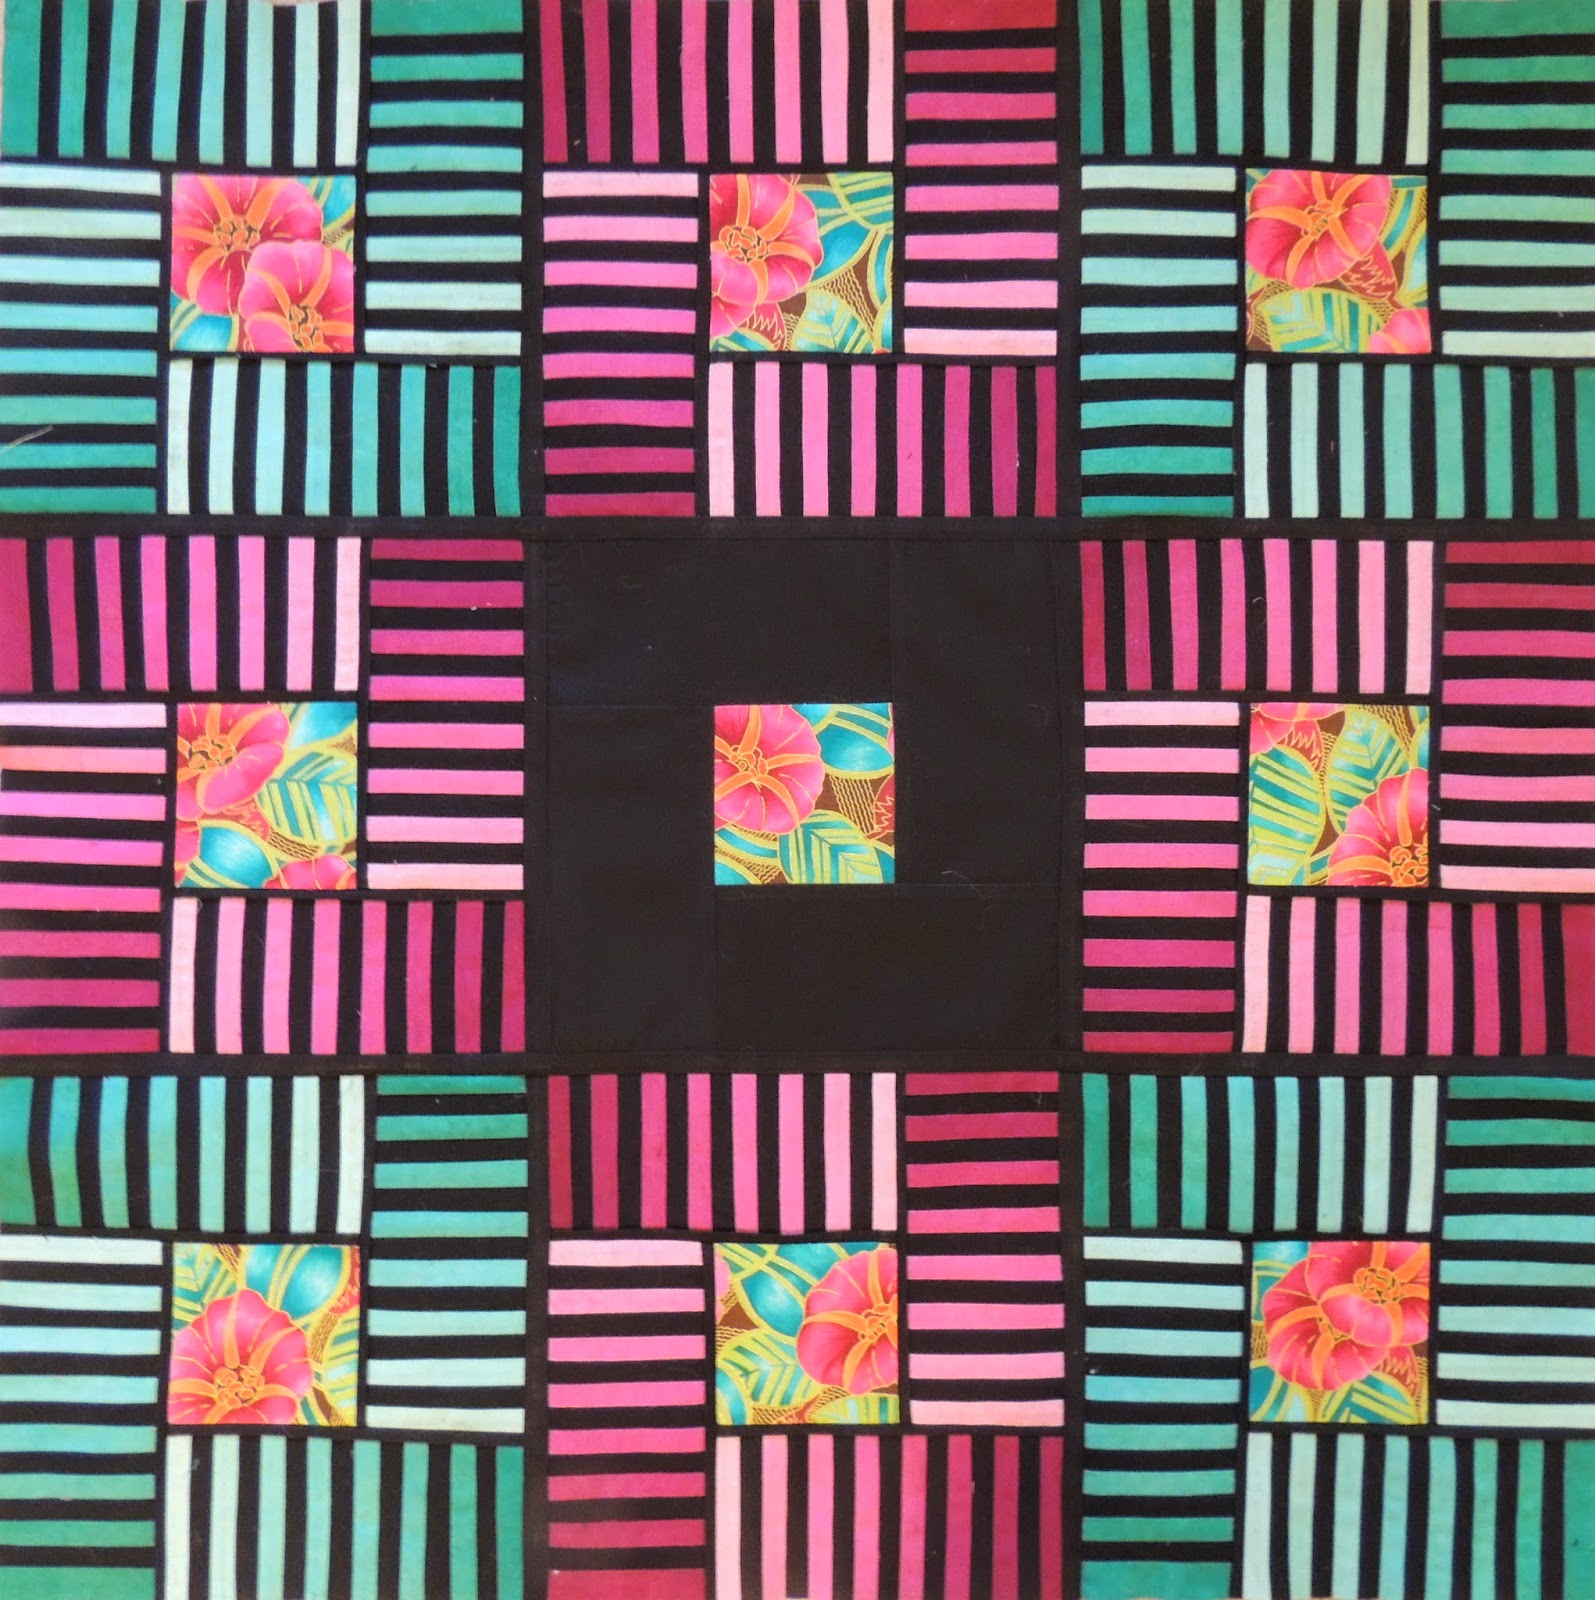 |
| Finished Quilt top |
Here is the pieced top, which I like as is. I don't think it needs a border, but still have time to play around with border treatments. The changes in value and color really give the piece a lot of movement and create an optical illusion where the strip sets appear to get wider as they move towards the lighter values creating a vortex spinning around the center squares!
Quilt #2: Pink Chopsticks
Several of the inspirational ideas I pinned used a slice and insert technique to slice a background fabric and insert fabric strips. I had read several magazine articles by Jacquie Gering outlining her slice and insert technique and while I loved the liberated look of the finished blocks, I needed some semblance of order in my quilts. As such, I created a few design rules to help me plan and organize my blocks and layout:
 |
| Pile o' pink patterned prints to supplement--say that fast 3xs! |
1. To add some sparkle and variety, I supplemented the 8 different values of pink hand dyed strips with patterned prints from my stash. I aimed to have 2-3 WOF strips in each of the 8 values and laid them out from light to dark with their corresponding hand dyed fabric strip.
2. Since I wanted the strips to pop, I cut 64 5" charm squares out of charcoal grey Kona solid for my background.
3. Starting with the lightest value strips, I started to assemble my slice and insert blocks. Half the blocks had the hand dyed fabric inserted first and the pattern print second, and the other half reversed the order so there were full strips of each fabric strip.
4. When starting out, I only made 1 or 2 blocks at a time so I didn't lose track of which pieces went where. But after the first few blocks were completed, I was able to slice and insert 4 blocks at a time, and then soon I was able to stagger the different phases to chain piece 8 blocks at a time. It sounds confusing but surprisingly enough, I didn't sew any units incorrectly!
 5. After running out of hand dyed fabric strip for the first set of 8 blocks, I used a more shallow angle for the hand dyed slices, and more extreme angles for the prints (requiring a longer length of fabric strip), so I was able to get 8 blocks from each strip of hand dyed fabrics (with just an inch or so to spare!). These 2 different angles also helped me keep track of all the block units when chain piecing 4 or 8 blocks at a time.
6. Once both strips were inserted and the block was pressed, I trimmed it down to 4.5" giving me plenty of wiggle room for any wonkiness/distortion created by the various angles.
7. At first I started with the light value blocks in the center and radiated out to more darker values, but quickly realized this plan would mean the outer rows have to blur all the remaining darker values. So instead, I gradated the values with the lightest in the top left corner and getting darker as I worked my way to bottom right corner. And I just took care not to have the blocks with identical strip sets laying adjacent to each other (corners kissing was ok).
These blocks were actually started 1 week before the challenge deadline (I really do seem to do my best work under pressure!!), but went together in a day or two. Once all laid out on my design wall, the blocks were super easy and quick to sew together into rows and then columns.
 |
| Pink Chopsticks Finished Top |
Interestingly enough, even though the grey charm squares were all cut out of the same fabric, it appeared to change in value in relation to the strip sets. Several of my fellow guild members even commented that the charcoal grey looked lighter with the lighter pinks at the top left, and darker in the bottom right. A very cool, yet unplanned magical effect of the fabric colors interacting with each other.
Quilt #3: Teal Chopsticks
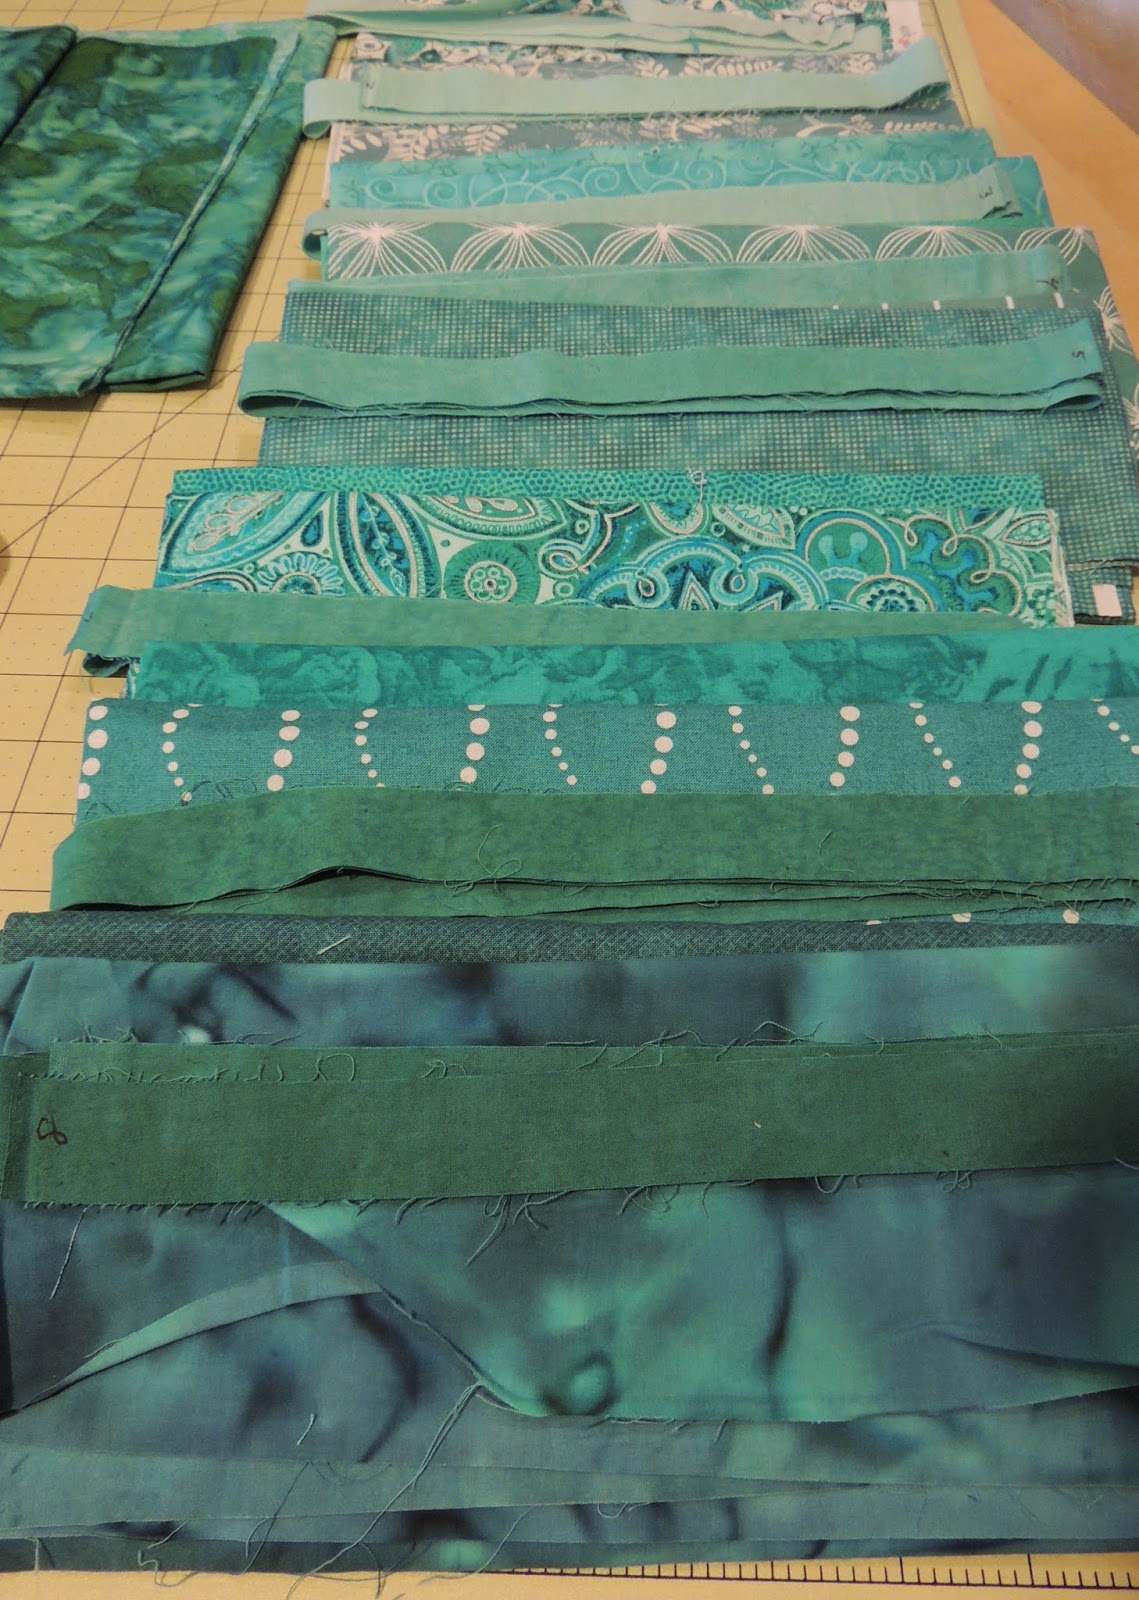 |
| Teal fabrics ready for a companion quilt |
Just as I was about to sew all the finished pink chopsticks blocks together into a quilt top, my dear Doug suggested that I make a companion quilt using the teal strips. Exasperated with the looming deadline, I convinced him that I needed to first focus on finish this quilt for the looming deadline (and joked that it might require a visit to a quilt shop or two to pick up some more fabric to make a companion quilt.) But it was too late--the seed of an idea had already taken root and a few minutes later, I was digging through my stash to pull out an assortment of teal fabrics in a variety of values!
This time around, I had an efficient system in place and quickly churned out slice and insert blocks (about 8 blocks/hour), and I just paced myself to do 16-24 blocks a day to meet the rapidly approaching show and tell deadline. I finished the last batch of blocks on Saturday and went to work Sunday evening to assemble all 64 blocks into rows/columns, finishing it in plenty of time for our Monday morning guild meeting big reveal!
 |
| Pieced Teal Chopsticks Quilt Top |
I've started to layer and baste the pink chopsticks quilt, but haven't finalized the quilt motif yet. But since these are all fairly small pieces (~30" square each), they should quilt very quickly and will make some fun and modern baby quilts. And I still have plenty of 1" strips remaining should I ever need to make a 3rd chopsticks quilt!!
But for now, I think I am done with 1" strips for a while!
The Spinning Borders quilt top is stunning, love it.
ReplyDeleteLove the serendipity of the gray seeming to change from light to dark in the Chopstick quilts.
The UFO exchange sounds like it was a fun and inspiring challenge.