
This August, we've been experiencing warmer than usual weather here in San Jose, CA. So I decided to keep cool with some Ice Dyeing. I've been wanting to try Ice Dyeing for over a year now, so I had already started to gather equipment along with several books, articles, and tutorials on the process including:
- "Having a Meltdown!: Ice Dyeing Artisan Fabrics for Quilting" book by Sondra L. Millard.
- "Dye Your Own Iced Parfait" article by Carol Ludington, published in Quilting Arts Magazine, June/July 2012.
- "Snow Dyeing Fabric" article by Janet Jo Smith, published in Quilters Newsletter, December/January 2013.
- "Dyeing with Snow and Ice" article by Lisa White Reber, published in American Quilter, January 2011.
- "How to: Ice (Or Snow) Dyeing" online tutorial by Dharma Trading Company.
The day before my first dye day, I spent 1-2 hours ripping fat quarters, 22" squares, and a few half-yard cuts of Prepared for Dye Pimatex fabric, and completed my fabric manipulations (folding, pleating, tying with rubberbands, etc) using a few new manipulations from Sandra L Millard's Having a Meltdown! book. Later that evening, I soaked all my fabric in a solution of warm water, soda ash, and salt.
Dye Day 1: Ice Dyeing with Powdered Dye
The next morning, I set up my outdoor wet studio. Last year, I purchased a variety of baskets and shallow dishpans from the Dollar Store. Each baskets was elevated to contain the fabric, with the dishpans placed underneath to catch the melted water & dye.
 |
| Ice Dyeing Preparations and Set Up |
On my way back from yoga class, I picked up 20 pounds of ice and it was a race against the sun to layout the fabric and layer with ice and dye powder. Quite a bit of the ice slipped through the basket holes, and I quickly realized there was not enough ice to adequately cover the fabric. So I ran back out to get another 20 pound bag of ice. Next I used plastic spoons to sprinkle on dye powder in a variety of color combinations.
 |
| Racing Against the Sun to Cover with Ice and Dye Powder |
I was surprised at how quickly the ice was melting in the hot sun, so I quickly covered each bin with a plastic bag. This greatly helped slow down the ice melting, and prevented the fabric from drying out. Even with the extra ice run, I had everything laid out, layered, and covered, plus minimal clean up, all completed in less than an hour! All that was left to do was watch as the ice melted and my fabrics batched in the warm summer sun.
 |
| Watching Ice Melt |
I woke up bright and early the next morning to unwrap my parcels of hand dyed fabric. My heart was racing with each sneak peek of fabric before loading it all into the washing machine for rinsing. After 2-3 rinse cycles, I inspected each piece up close and personal while pressing them dry, while noting what I liked about each piece, and what I might do differently the next time.
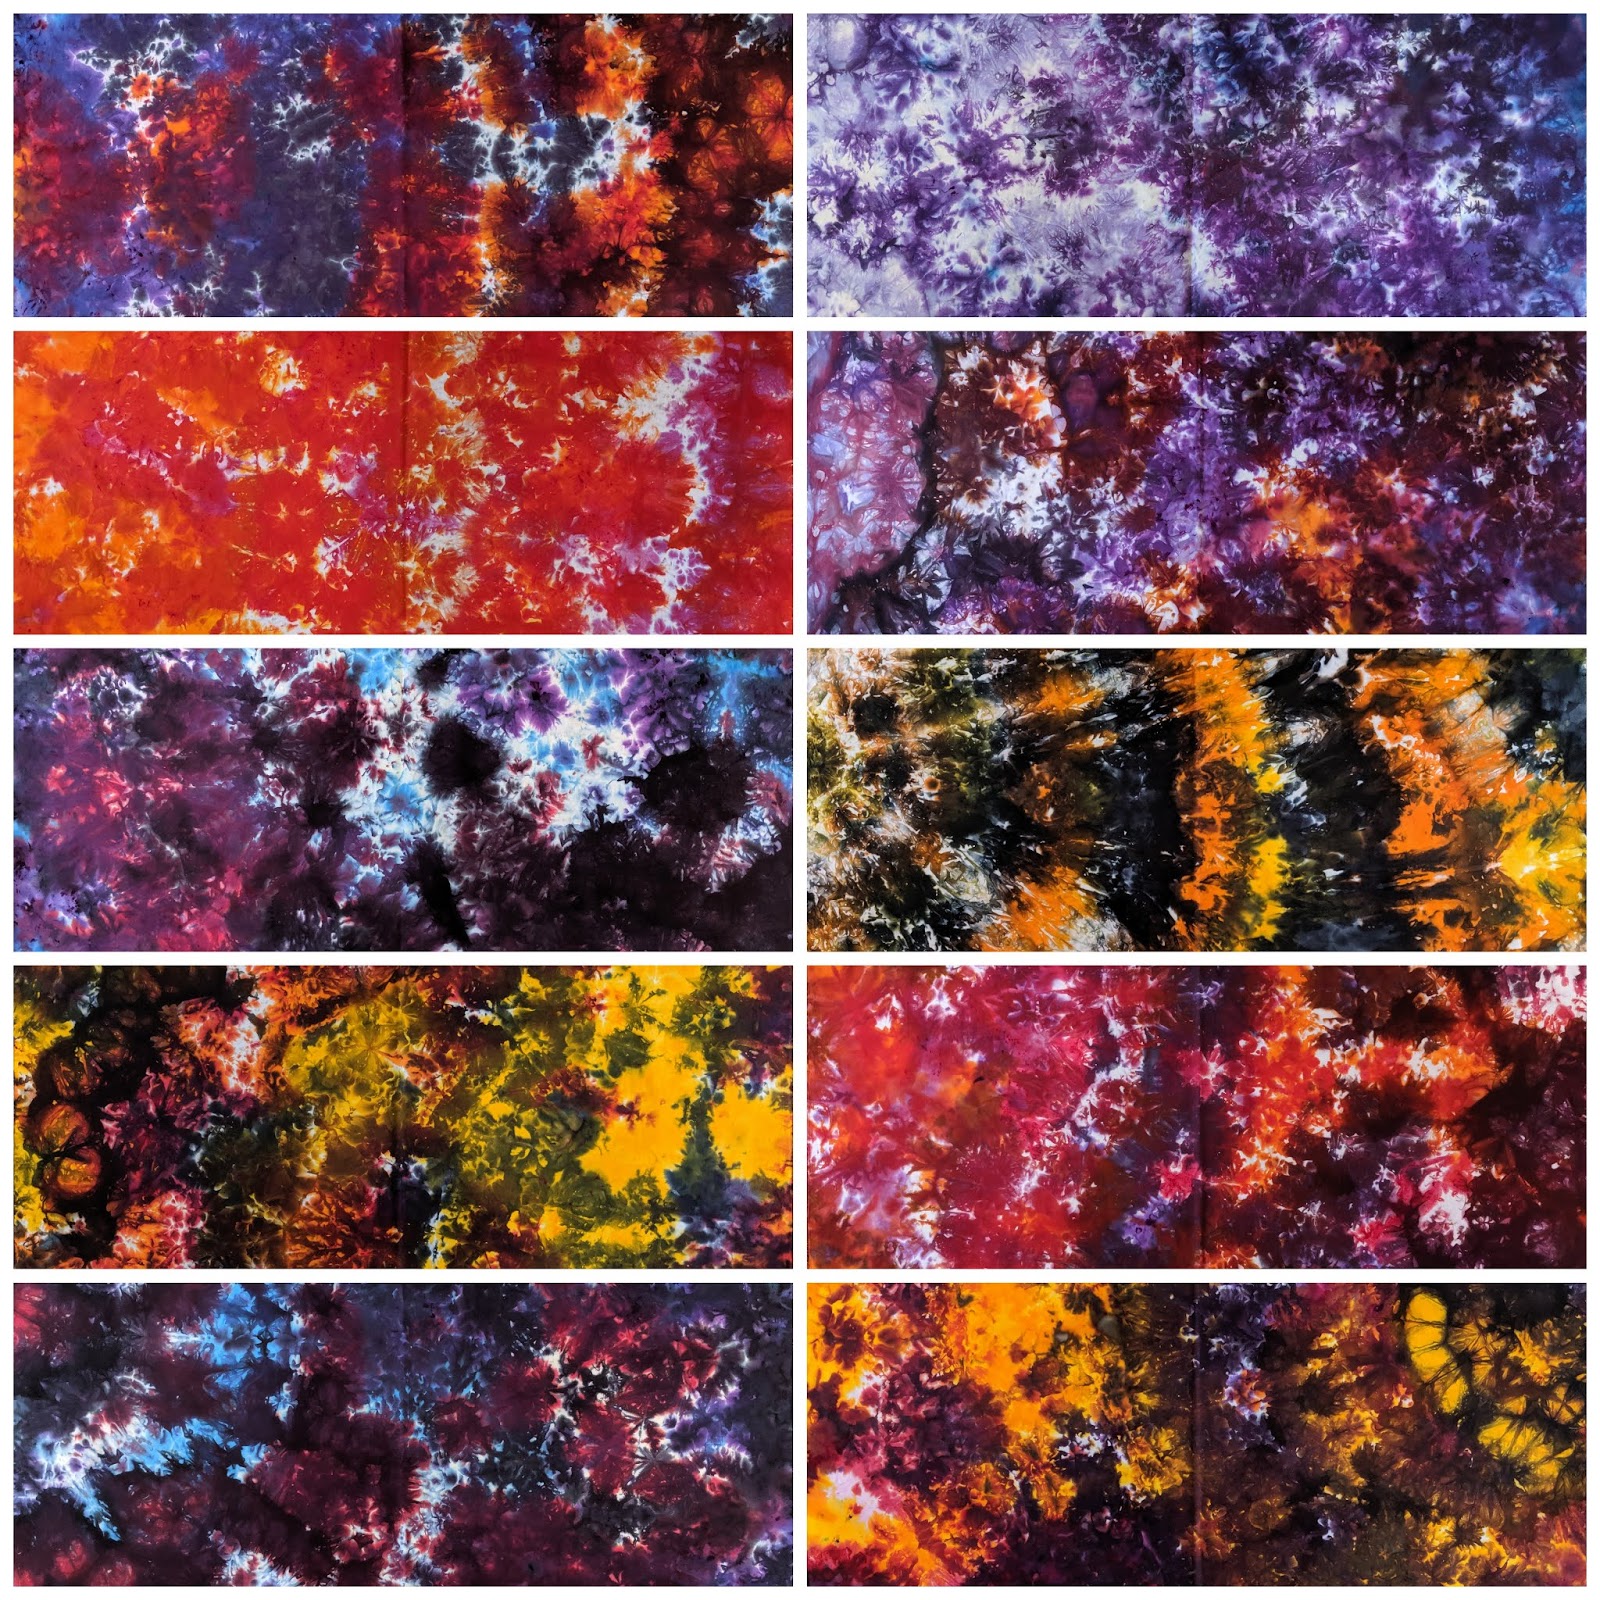
Here are some of my favorite fabric outcomes featuring brilliant explosions of red-violet, red, orange, and a little bit of yellow, grey, and black.
 |
| Warm & Wow! |
Quite a bit of emerald green, blue, and mermaid teal dye powder was used the day before, but was not absorbed into the fabric. As I was pressing out my fabric, I recalled reading that turquoise dye performs better in warmer temperatures, so I suspect that using with ice dyeing was the culprit. Regardless, these fabrics possess a subtle beauty.
 |
| Too Cool for Blues, Greens and Teals |
One of my dye friends, Marie, suggested I place fabric in each wash basin to catch some of the unused dye. While they initially looked very mucky going into the rinse out, they yielded some really spectacular color and patterning!!
 |
| Dye Catchers |
Dye Day 2: More Experimentation with Ice Dyeing with Powder
More PFD fabric manipulations were prepared and soaked in the Soda Ash bath. I set up my dishpans and baskets, and picked up some more baskets and bins from the Dollar Store. And I made sure to get plenty of ice this time (60 pounds to accommodate the newly purchased baskets/bins!)
For this second session, I wanted to address some of the challenges experienced the day before:
I conducted some more testing using only a range of blue and yellow dyes. I was pleased to see several blues and yellows be successful with this round of ice dyeing, but will need to conduct more testing to identify which blues and yellows perform best as I used 4+ colors on each sample.
 |
| Blue & Yellow Studies |
 |
| Hot Stripes |
Not only do I love all the subtle variation in patterning, but I love how many of the premixed colors split and created new colors, as the different colored dye molecules traveled through the ice and fabric at varying speeds.
 |
| More Colorful Bursts |
One more modification made to my process was to line each basket with a presoaked fat quarter of PFD fabric. This layer not only helped prevent the ice from falling through the holes in the basket, but also soaked up some of the unused dye and yielded some spectacular color bursts.
 |
| Layering Fabric Yields Layers of Color and Patterning |
Once this batch of fabrics were rinsed and pressed, I took the rest of the day off to recover, and plan for my next round of experimentation.
Dye Day 3: Ice Dyeing using Liquid Dye Stock
While I loved each of my fabrics thus far, I wasn't getting the bright and vibrant colors that were featured in the Ice Dyeing book and magazine articles. I wondered if using liquid dye stock might yield bolder outcomes. In the morning, I mixed up several small bottles of dye stock using this formula:
- 1 cup of warm water
- 1 tablespoon of Urea
- 1 tablespoon of dye powder (Dharma colors used, except when noted, include: Better Black, Cerulean Blue, Grape, Eggplant, Amethyst, Fire Red, Deep Orange, and ProChemical's Golden Yellow).
 |
| Stocking up on Dye Stock |
As it was now the weekend, Doug was home, so he agreed to run out to the store to pick up ice for me! Now I could take a little extra time to layout my baskets, bins, and think about placement of my fabric for use with gradient dyeing. As a bonus, Doug captured some action shots!
 |
| Round 3 of Ice Dyeing |
I picked up some painter's plastic tarp, that I cut in half and used that to cover each table. Not only was it much faster and easier to cover, but much easier to clean off and reuse with future dye days. The next morning, I raced outside to check out my parcels and begin the rinsing process.
 |
| Batching |
Let's just say there was lots of swooning to be had as I opened up each parcel and studied the details while pressing each piece of fabric.
 |
| Stunning Stripes |
 |
| Breathtaking Bursts of Beauty |
 |
| Colorful Explosions |
At the conclusion of Dye Day 3, I made the following observations:
- Liquid Dye stock yielded more brilliant color
- Schedule future Ice Dyeing days when Doug is home!
- I mixed up WAY too much Dye Stock, as I only used 1/3 of the bottles!!
So I ripped up more PFD, folded/wrapped more fabric, and soaked them overnight for Round 4 of Fabric Dyeing!
Dye Day 4: Use Leftover Dye Stock (no ice)
For this final day, my primary mission was to use up all the remaining dye stock. No ice was used, and I simply applied the remaining liquid dye stock directly onto the presoaked fabric.
 |
| Why Can't Laundry Always Be This Fun & Beautiful!?!? |
This was the most brilliant batch of the week!!
 |
| Bright and Happy Stripes |
 |
| Brilliant Bursts of Color |
 |
| Technicolor Explosions |
I pulled out two of the fabrics from earlier Ice Dyeing sessions that yielded very little color, and overdyed them. You can see the before (top row) and after (bottom row).
 |
| Overdyed Duds |
In case you were wondering, here are a few fun statistics:
- 163 pounds of ice involved
- A whopping total of 45.25 yards (44" WOF) dyed, rinsed, pressed, and admired!!
Phew!! Yes, this required an investment of time and energy, but the results are soooo worth it!!! Now comes the hard part: cutting into these pretties and incorporating them into my quiltmaking!

Wow...those are awesome. I love fabric dying, but haven't tried manipulating the fabrics before. Now you have me interested again. It's a ton of work, but I do love the results, hand dying gives you.
ReplyDeleteThank you!! I really enjoy the fabric dyeing process and the fabulous results. I enjoy each opportunity to play and experiment, and only wish I had more time!!
DeleteFabulous results….congratulations…… My small fiber group has beenice-dyeing for a good 5 years and we always say it’s like Christmas morning when we unfold our fabrics. One thing we do differently is cover our trays with black plastic….mainly to generate more heat to speed up the melting time. Yes, it does get hot here, but most of the time we’ve done it in spring or fall when temps. are much lower at night. We also always scrunch up fabric in the tray to catch the melted ice/dye….love your approach of adding a single layer to the basket!! Thanks for taking the time to share your wonderful photos and process.
ReplyDeleteHow fun! Yes--I agree about the Christmas morning goodies. In fact this year, I dyed Christmas eve and loved extending the Christmas joy by unwrapping my hand dyed fabrics!! I will keep the tip re: black plastic in mind for when I get the itch to ice dye in the winter/spring. And I hope you try lining the baskets with your new group ice dyeing session--I think you will love the happy outcomes!!
DeleteSo, so beautiful...you are very fortunate to have the space to do this wonderful work (said the apartment dweller).
ReplyDeleteThank you! Some of the articles I read showed set ups that were indoors. I've tried a few times in my kitchen (with everything covered) and didn't destroy the house!
DeleteWow, wow, wow!!! What an adventure and what great results!!! Fun photo journal of the whole experience, too!!!
ReplyDeleteThank you! It was a fun (albeit a bit exhausting) week but the results were well worth all the time and effort. I've been meaning to treat myself to another day of fabric dyeing but I've been doing more painting which yields faster results.
DeleteWhat a fun outdoor project with stunningly beautiful results! Thank you for linking up to Show Me Something.
ReplyDeleteThanks--it was fun reliving that week of daily ice-dyeing. One of these days I will have to try it again...
DeleteThank you Dale--It made for a productive week with lots of learning and happy outcomes. Although it was exhausting. One of these days I will play again especially given the warm summer weather!! Hope you are inspired to give it a try!!
ReplyDeleteWOW! What a way to turn the heat to your favor - these are gorgeous and amazing. I especially love the warms and brights - I love your fearless and fun experimentation. Can't wait to see what you do with some of these!
ReplyDeleteThank you--it certainly made for a colorful week! I love conducting little artistic experiments and seeing what occurs. It definitely keeps me curious to play. I hope to use more of these in my work as they are so beautiful!!
DeleteBeautiful work! How did you fold the fabric?
ReplyDeleteThank you. I use a variety of folding/pleating to create the range of dyed patterns. You can see a bit of the folding/scrunching/rolling in some of the photo mosaics!
DeleteHello! I am wayyyy late to this convo, but wanted to share how much I appreciate you sharing your thoughts, plan and pictures with us. One question…. For the dye liquid, did you just squirt it in the presoaked fabric? Your last results are absolutely stunning!!!
ReplyDeleteWelcome! I'm so glad you enjoyed this post and found it informative. Yes--the last round of dyeing was using up the premixed dye concentrate by pouring it over fabric that was presoaked in soda ash including a variety of fabric manipulations/folds/pleats, etc. Happy fabric dyeing!!
ReplyDelete