I've been admiring the carved/stamped designs of Ali, aka 3 Dotted Penguins for some time now. I've been eager to take one of her live, online workshops which were either sold out or conflicted with my own teaching schedule. So when she announced a few holiday sessions in early December I jumped at the chance to sign up for not just one but two of her Simply Block Printing 3-hr sessions: Intro to Block Printing and Intro to Repeat Patterns.
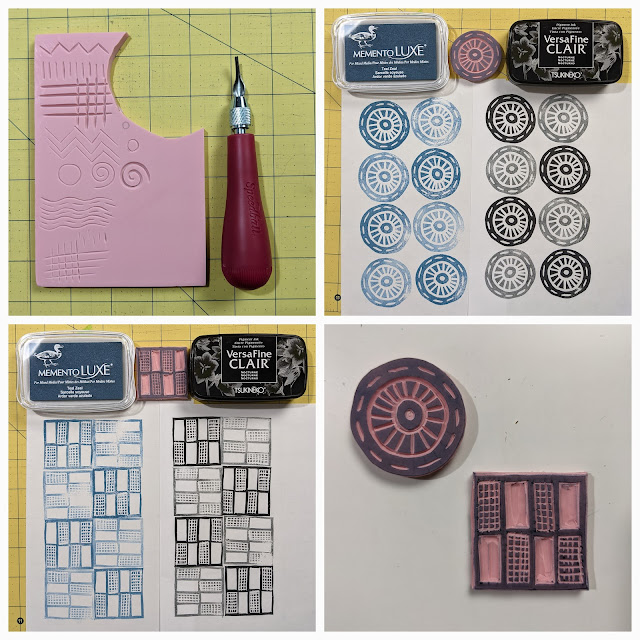
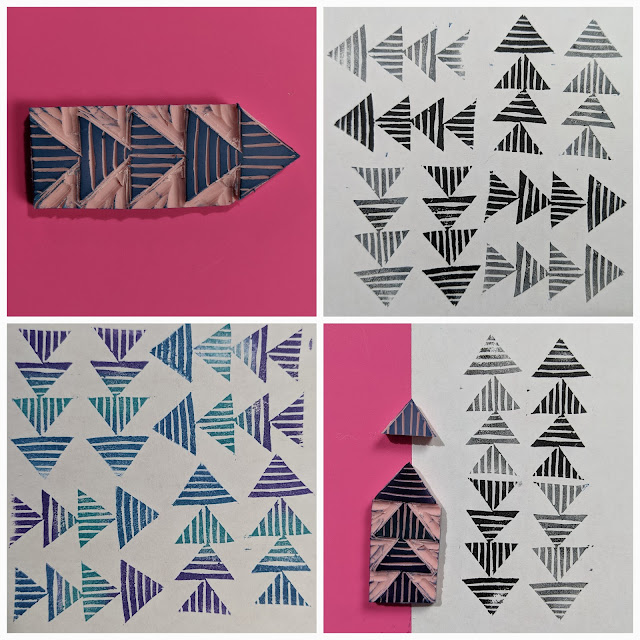
Ali did a fantastic job of covering all the basics of creating your own hand carved stamps: tools, supplies, inks, design, and safety in the first workshop. She provided us with a few warm up exercises in addition to a few holiday-themed designs we could use or we had the option of carving out our own design. Below are a few pictures of my carved stamps and printing done during class...
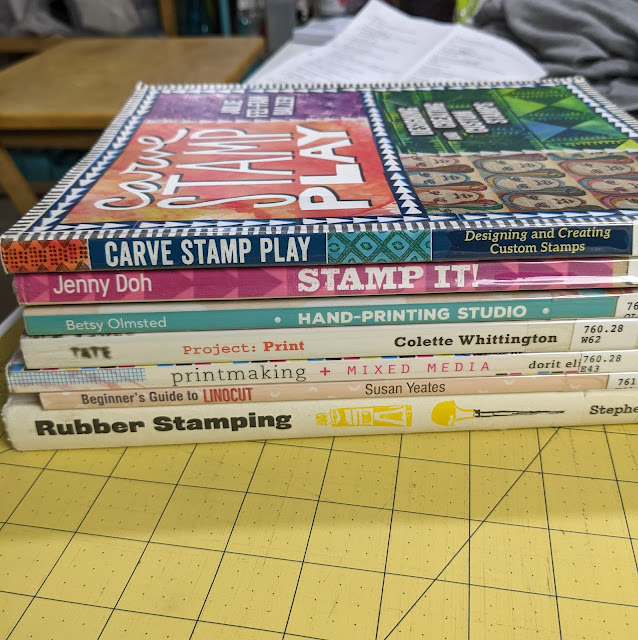
To say I was hooked is an understatement. Immediately after class, I went to the local library and stocked up on books related to linocutting/stamping.
The next morning, I was back at my computer eager to learn more about carving designs that yielded interesting repeat patterns. Again, Ali expertly walked us through the process of drawing/transferring a design she created for the class that would yield secondary patterns along the edges and corners. This stamp required a bit more concentration given the more intricate curves and spaces, but I managed to complete it during class including a few different stamped designs.
The next morning was our monthly online guild meeting where I found myself multitasking as I carved some more. My design stated with 5 flying geese but one was ultimately set free to yield better secondary designs.
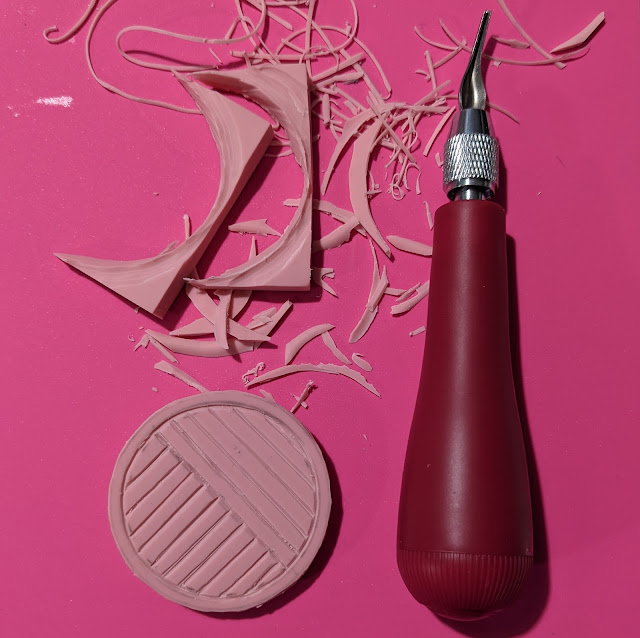
I am loving this new direction in my work! I very much enjoy using the tools to carve out the shapes, I love the challenge of thinking positive/negative when determining where to carve vs. leave intact, and of course, I love stamping out the designs to see what the finished stamp yields!
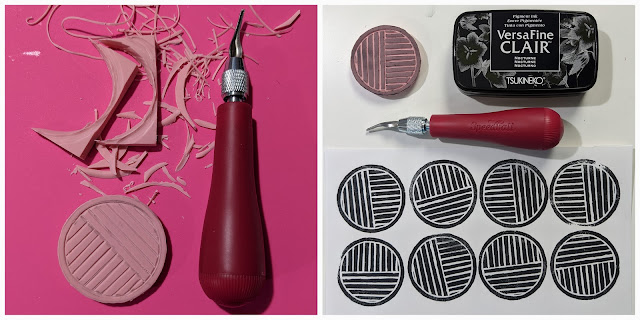
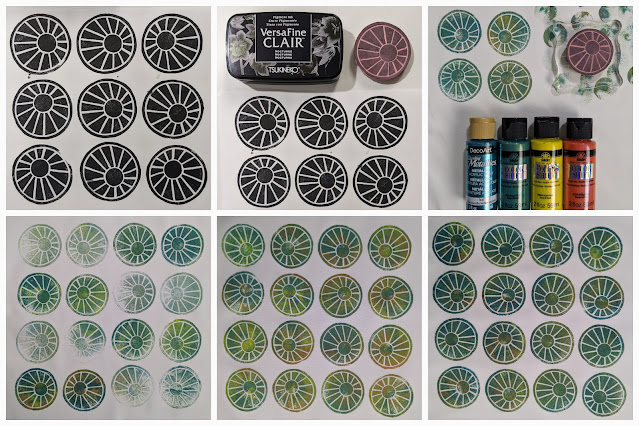
Lately I've been honing my skills by focusing on carving 2" circular stamps featuring different textures, lines, patterns, and shapes in the center. Up until now I've been stamping with an ink pad on photocopier paper which yields crisp patterns, especially these Tsukineko VersaFine Clair ink pads.
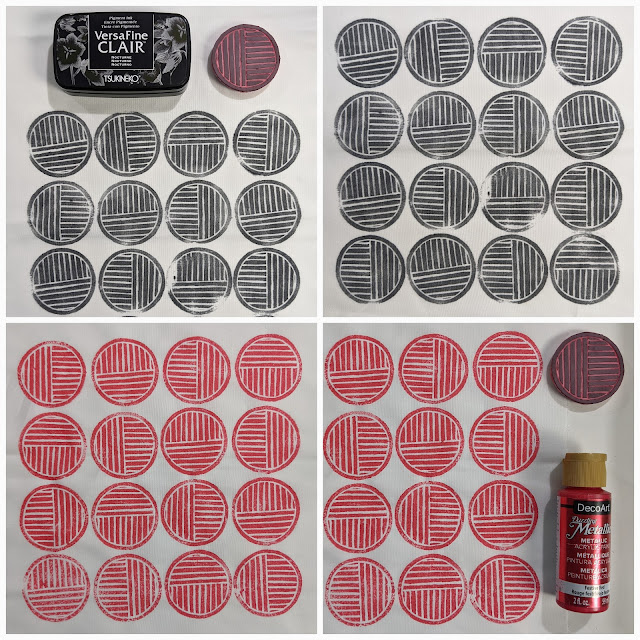
Of course it was only a matter of time until I started stamping on prepared for dye fabric! At first I used the ink pads which were not nearly as vibrant and crisp as on paper. So then I switched to DecoArts Dazzling Metallics acrylic paints which yielded more vibrant color.
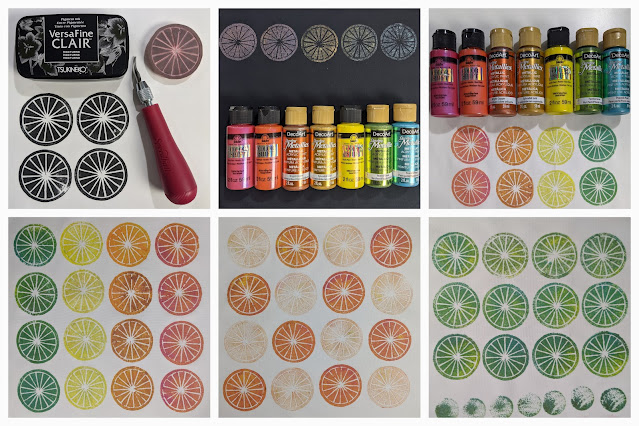
The next day, I squeezed in a bit more of carving with these wheel spokes and acrylic paints. Initially I had hoped to stamp on black fabric but then switched to white backgrounds to better showcase the colors. Once I started to stamp it in blue and green paint, I immediately saw citrus slices. More yellow, orange, and pink paint were squirted onto my palette to create limes, lemons, oranges, and pink grapefruit! Hmmmm...I wonder why I was craving a margarita?!?
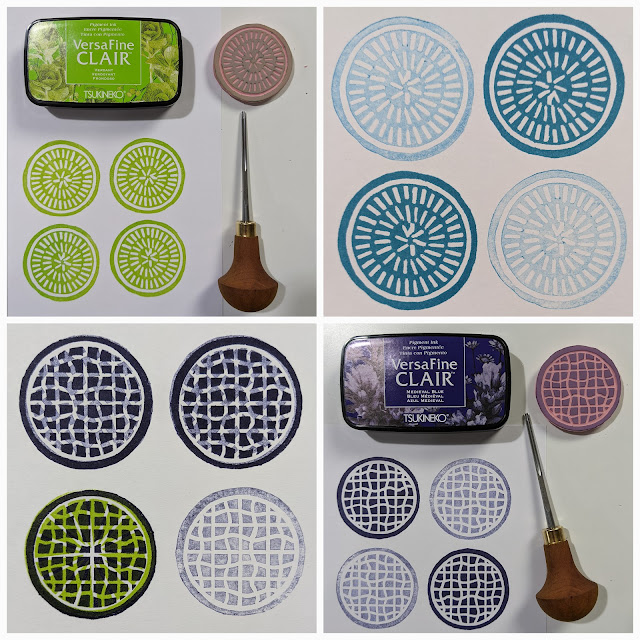
Here's another fun circular design which I initially saw as beach balls. When I sent my mother the black test stamps, she responded with "Looks like chameleon eyes...stamp it in variegated colors." A quick google image search of chameleon eyes inspired my paint palette. There was a bit of blending in of all four colors before applying to the stamp. I had fun moving the eye balls around in different directions...
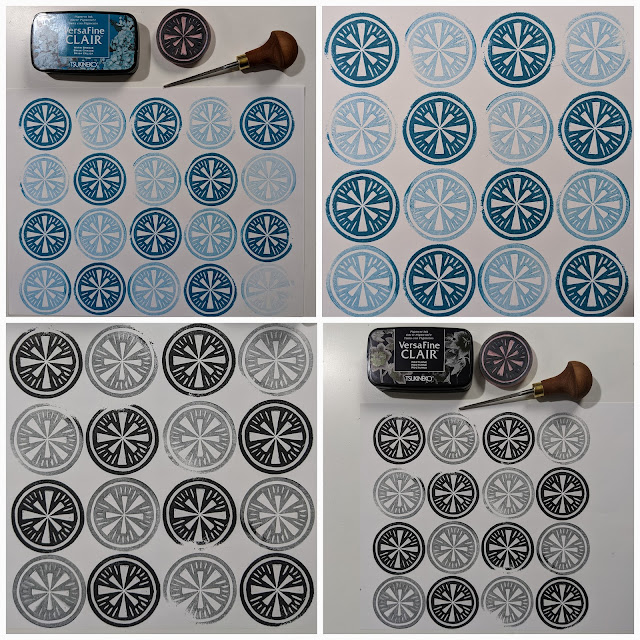
Santa Clause delivered a couple of new Pfeil lineoleom block carving tools to try out on Christmas eve. I had so much fun using the new tools that I carved out two circular designs which were stamped using alternating and overlapping ghost prints (printing a second time before reloading with ink/paint).
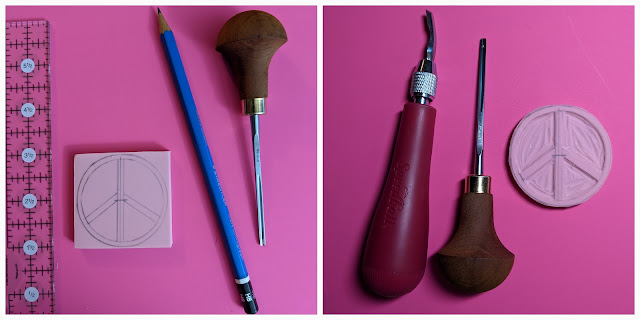
More Christmas day carving as I channeled my Christmas wish for Peace on Earth.
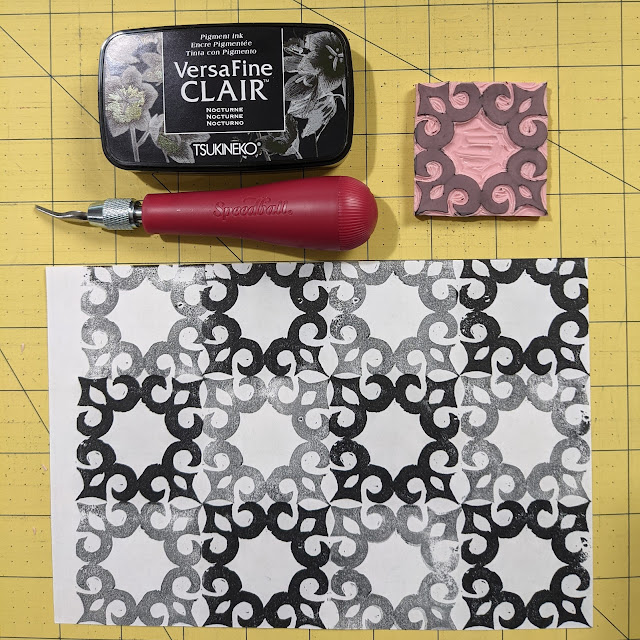
Going with the flow during this evening's carving/stamping session. I love the movement of this design especially when stamped out in a grid!
I was especially intrigued by the secondary designs that emerged as I rotated the block in the bottom two photos. So the next morning I played more with these secondary designs...
One more design inspired by the fireworks on New Year's Eve, although once stamped out, I think it looks more like a ribbon bow on a package.
Many thanks to Ali's well-paced and organized class and all the expert tips she provided, I've carved and stamped 12 designs, with lots more design ideas swirling about in my head. Plenty of carving blocks are stocked in my stamping kit and more ink pads are en route so I can add new colors to the mix. I can't wait to join Ali again for her Repeat Patterns Deep Dive 1 to advance my carved stamp designs.
If you want to learn how to carve your own rubber stamps, I highly recommend learning from
Ali of 3 Dotted Penguins. Her
class schedule is posted on her website (she just opened up her January Intro classes and the first is already sold out). While you wait to get into her next class, I encourage you to sign up for her newsletter so you'll be the first to learn of new classes, check out her
Free Resources (her Free Mini Guide: My Favourite Block Printing Supplies is packed with great tips), and
follow her on Instagram.


wow! you've got me hooked and i haven't even tried it yet! Love all of your designs! is that pink stuff you use to carve, linoleum? Can't afford classes, but will check out her free resources guide to block printing supplies and order some. thanks for the inspiration!
ReplyDeleteYay! I am so glad you are inspired to try carving your own stamps. Ali's resource guide provides lots of direction on products/tools. I also picked up a few tips and inspiration from the books I borrowed from the local library. Good luck and I hope you will share your progress/designs!
Deletelink did not work to her free resource page and i am not sure my last comment got posted either.
ReplyDeleteOh I am sooo sorry about the broken link. It has been fixed and here it is for your reference: https://www.3dottedpenguins.com/free-resources/
Deletethanks so much. I love the fearless and committed way you work and immerse yourself in all the wonderful things you make.
DeleteYou are most welcome. Glad to share my creative pursuits, including my starting point as we are all beginners at some point.
Delete