
A dear friend from graduate school reached out to ask if I could make a few pillows to honor her husband who had passed away recently. She saved several of his flannel shirts and wondered if I could use them to sew 3 pillows for his two young sons and herself. I was honored and said yes immediately, although I confess that I was also daunted by this request as I wasn't sure how best to proceed with the design and/or construction. I just hoped that once the shirts arrived, the inspiration would come to create something special to honor his life as a loving husband and father, while also bringing a bit of comfort to his surviving family members.
Read on as I share my design inspiration and process for constructing four quilted pillowcases in his memory, may they inspire you to create something celebrating your loved ones.
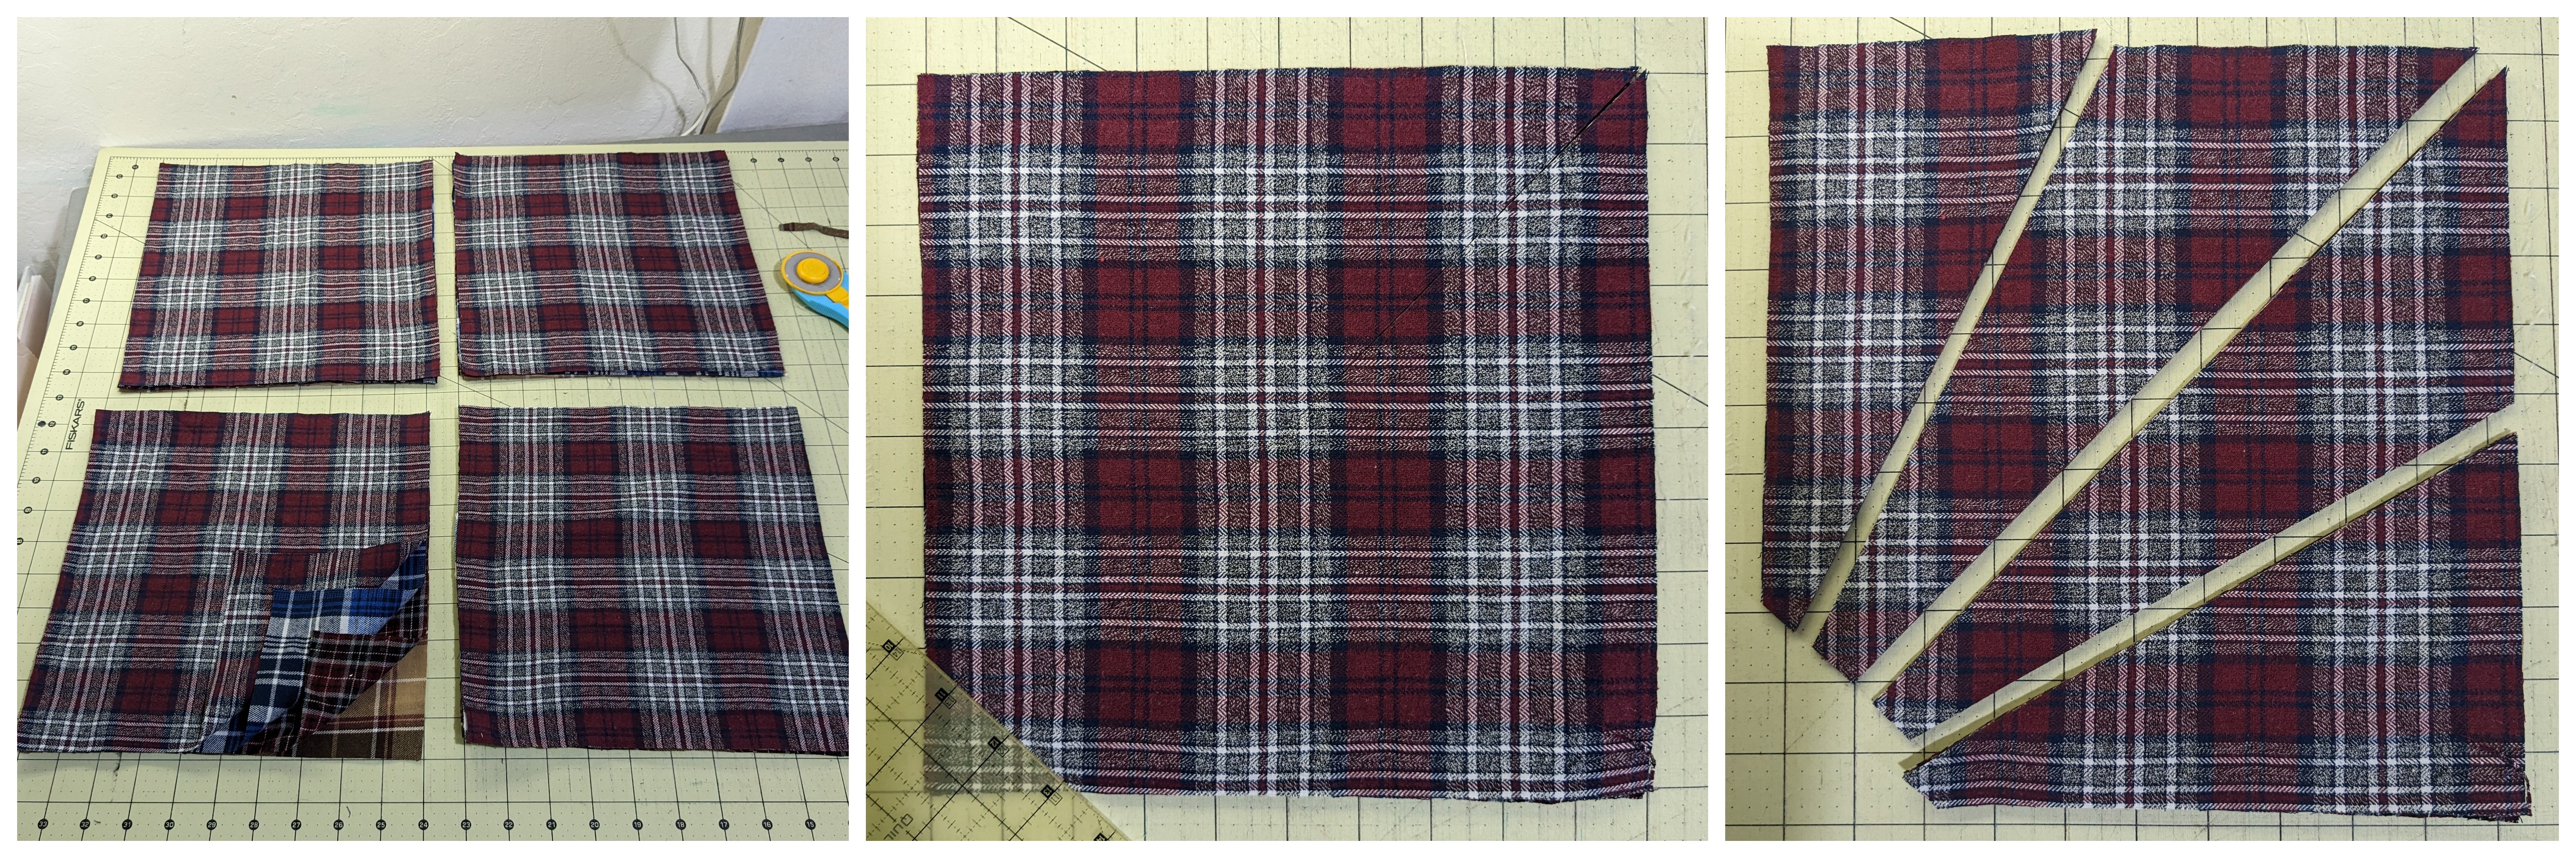
My first step was to deconstruct the 6 flannel shirts, taking great care to preserve every inch of usable fabric, especially since I didn't have a design or construction plan yet.

This process helped me to get a sense of available yardage while also seeing how the colors/patterns interacted with each other. Here is a rough sketch that helped me get started.

I revisited an improvisational stack and whack technique used while making this Shoot for the Stars quilt. While only three pillows were requested, this technique would yield four, which provided a little insurance for any mishaps. Four 10" squares were cut out of four of the contrasting flannel shirt panels. Four piles of four squares were stacked, ensuring each pile included a square from each of the four shirts. As the flannel fabric had no right and wrong side, I did not have to worry about ensuring the right side was facing up, but once the cuts were made, I had to be careful not to turn any of them over so the would fit properly when pieced. Using a rotary cutter and rule for a straight edge only (no measuring), the following order of cuts were sliced through each stack:
- Removing 2" from one corner which would help reduce bulk so I did not have 16 seams coming into the center and make it easier to piece. I used the markings on my mat to cut from 2" up and over.
- A diagonal cut to the opposite corner
- Two more cuts that were roughly spaced between the center diagonal and outside edges
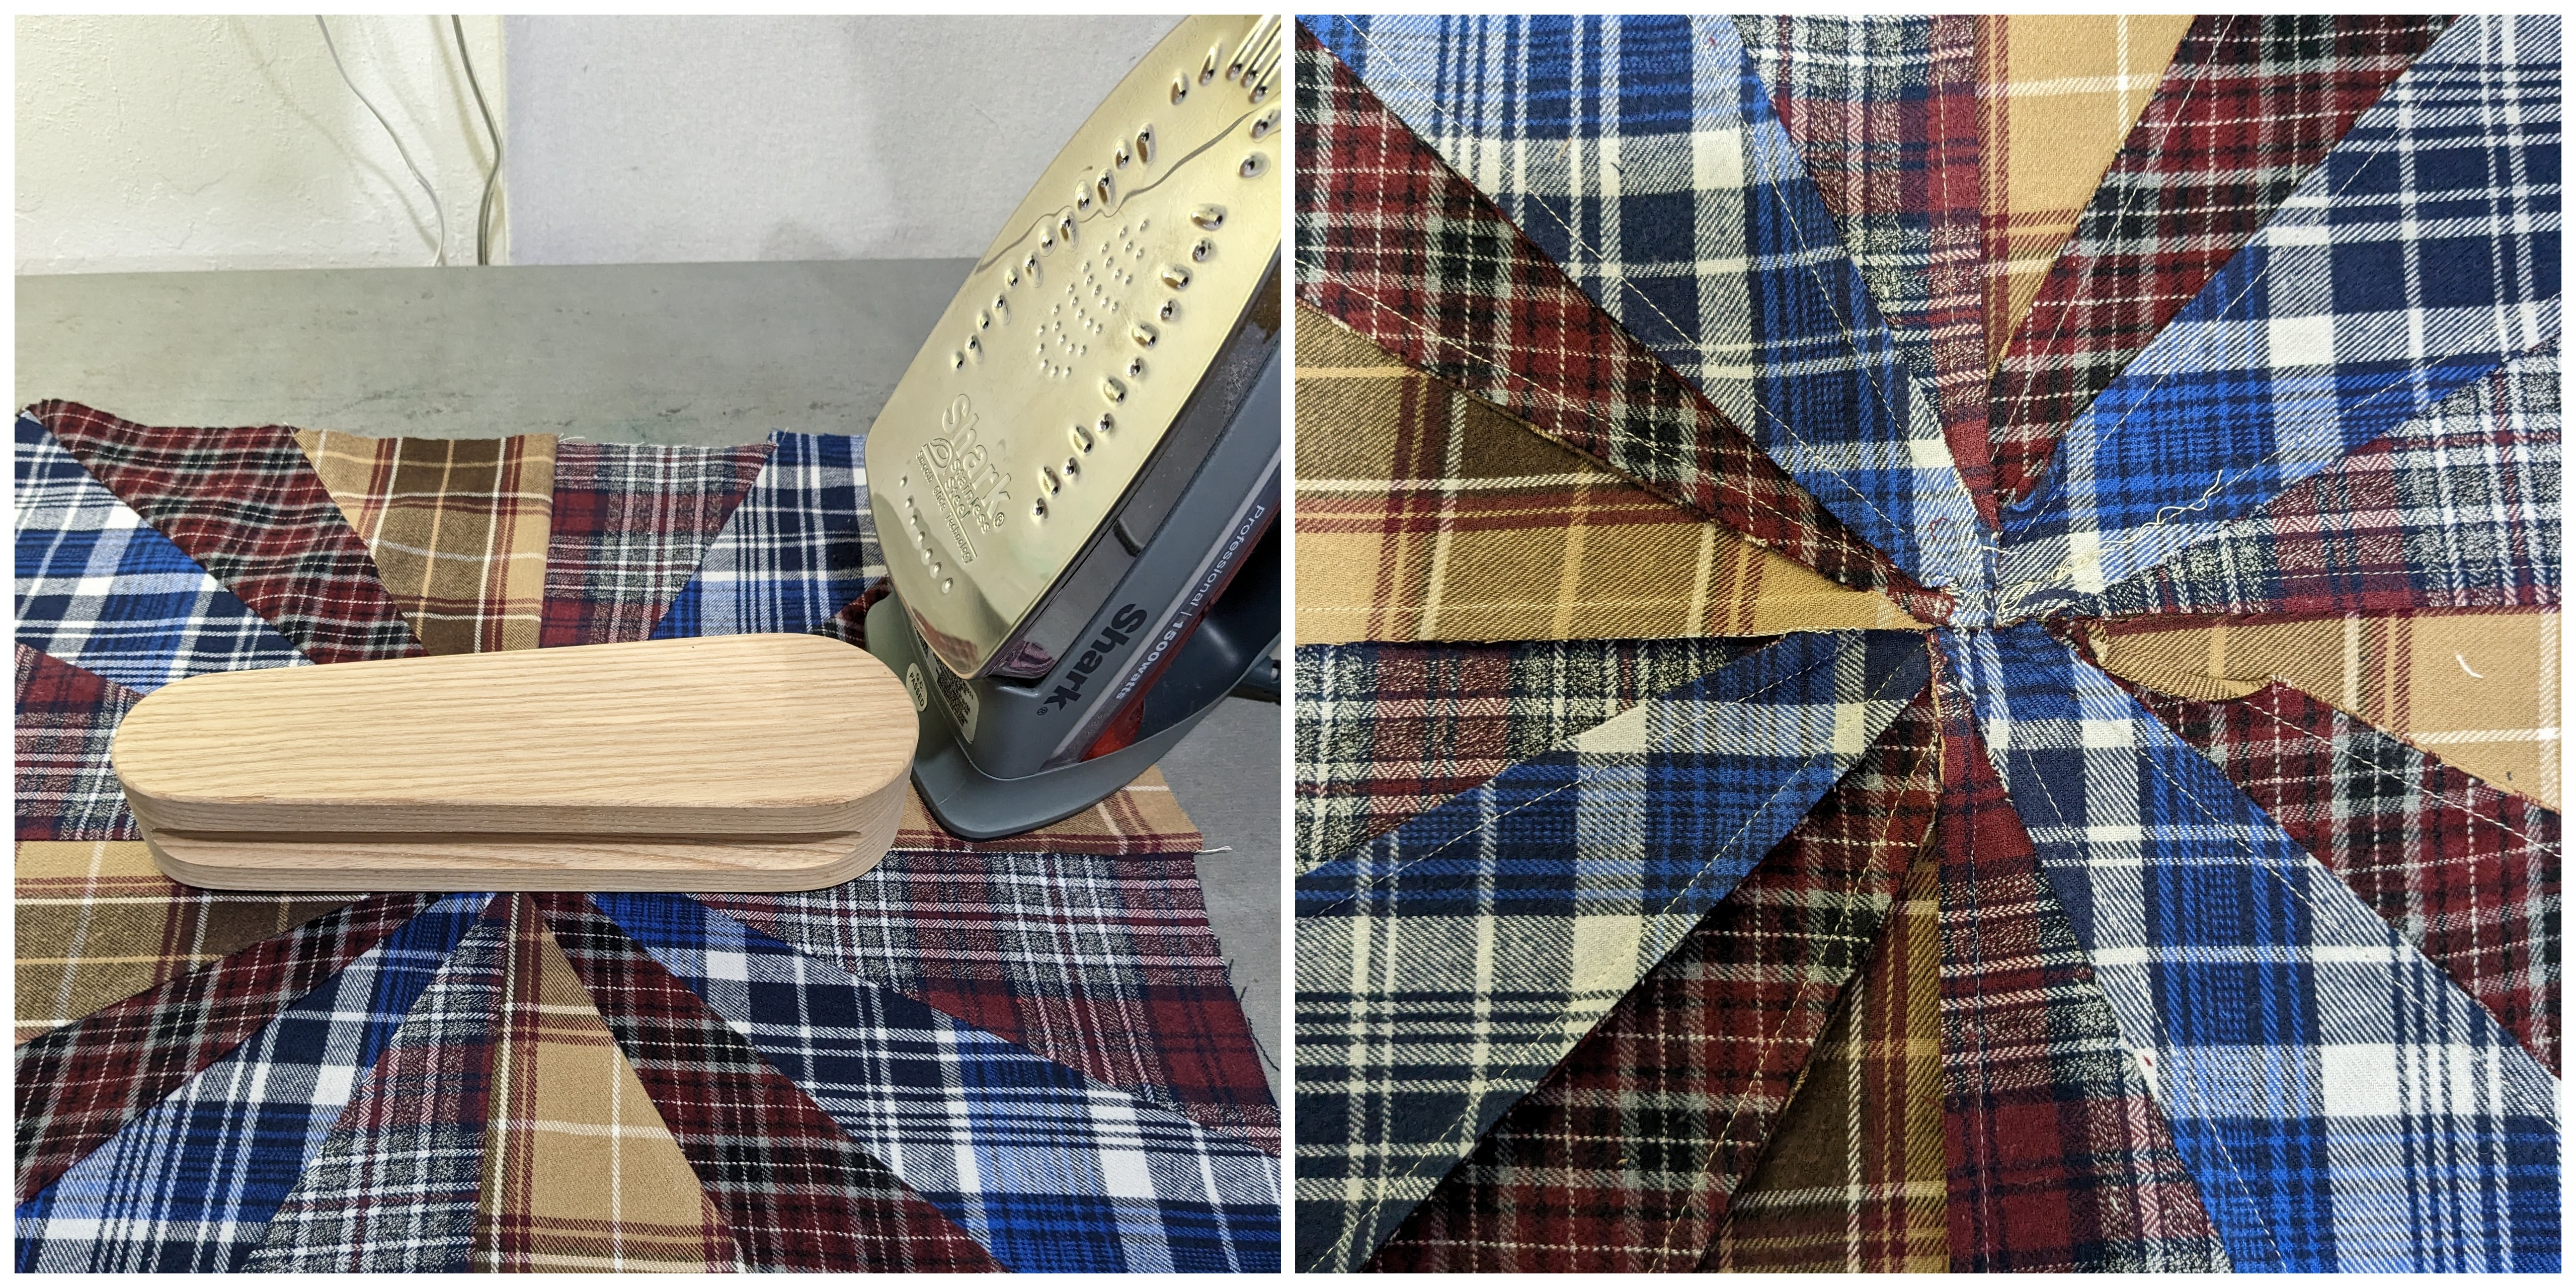
Each stack was then shuffled onto its own tray for chain piecing, taking care to keep them organized and together with their respective stack.

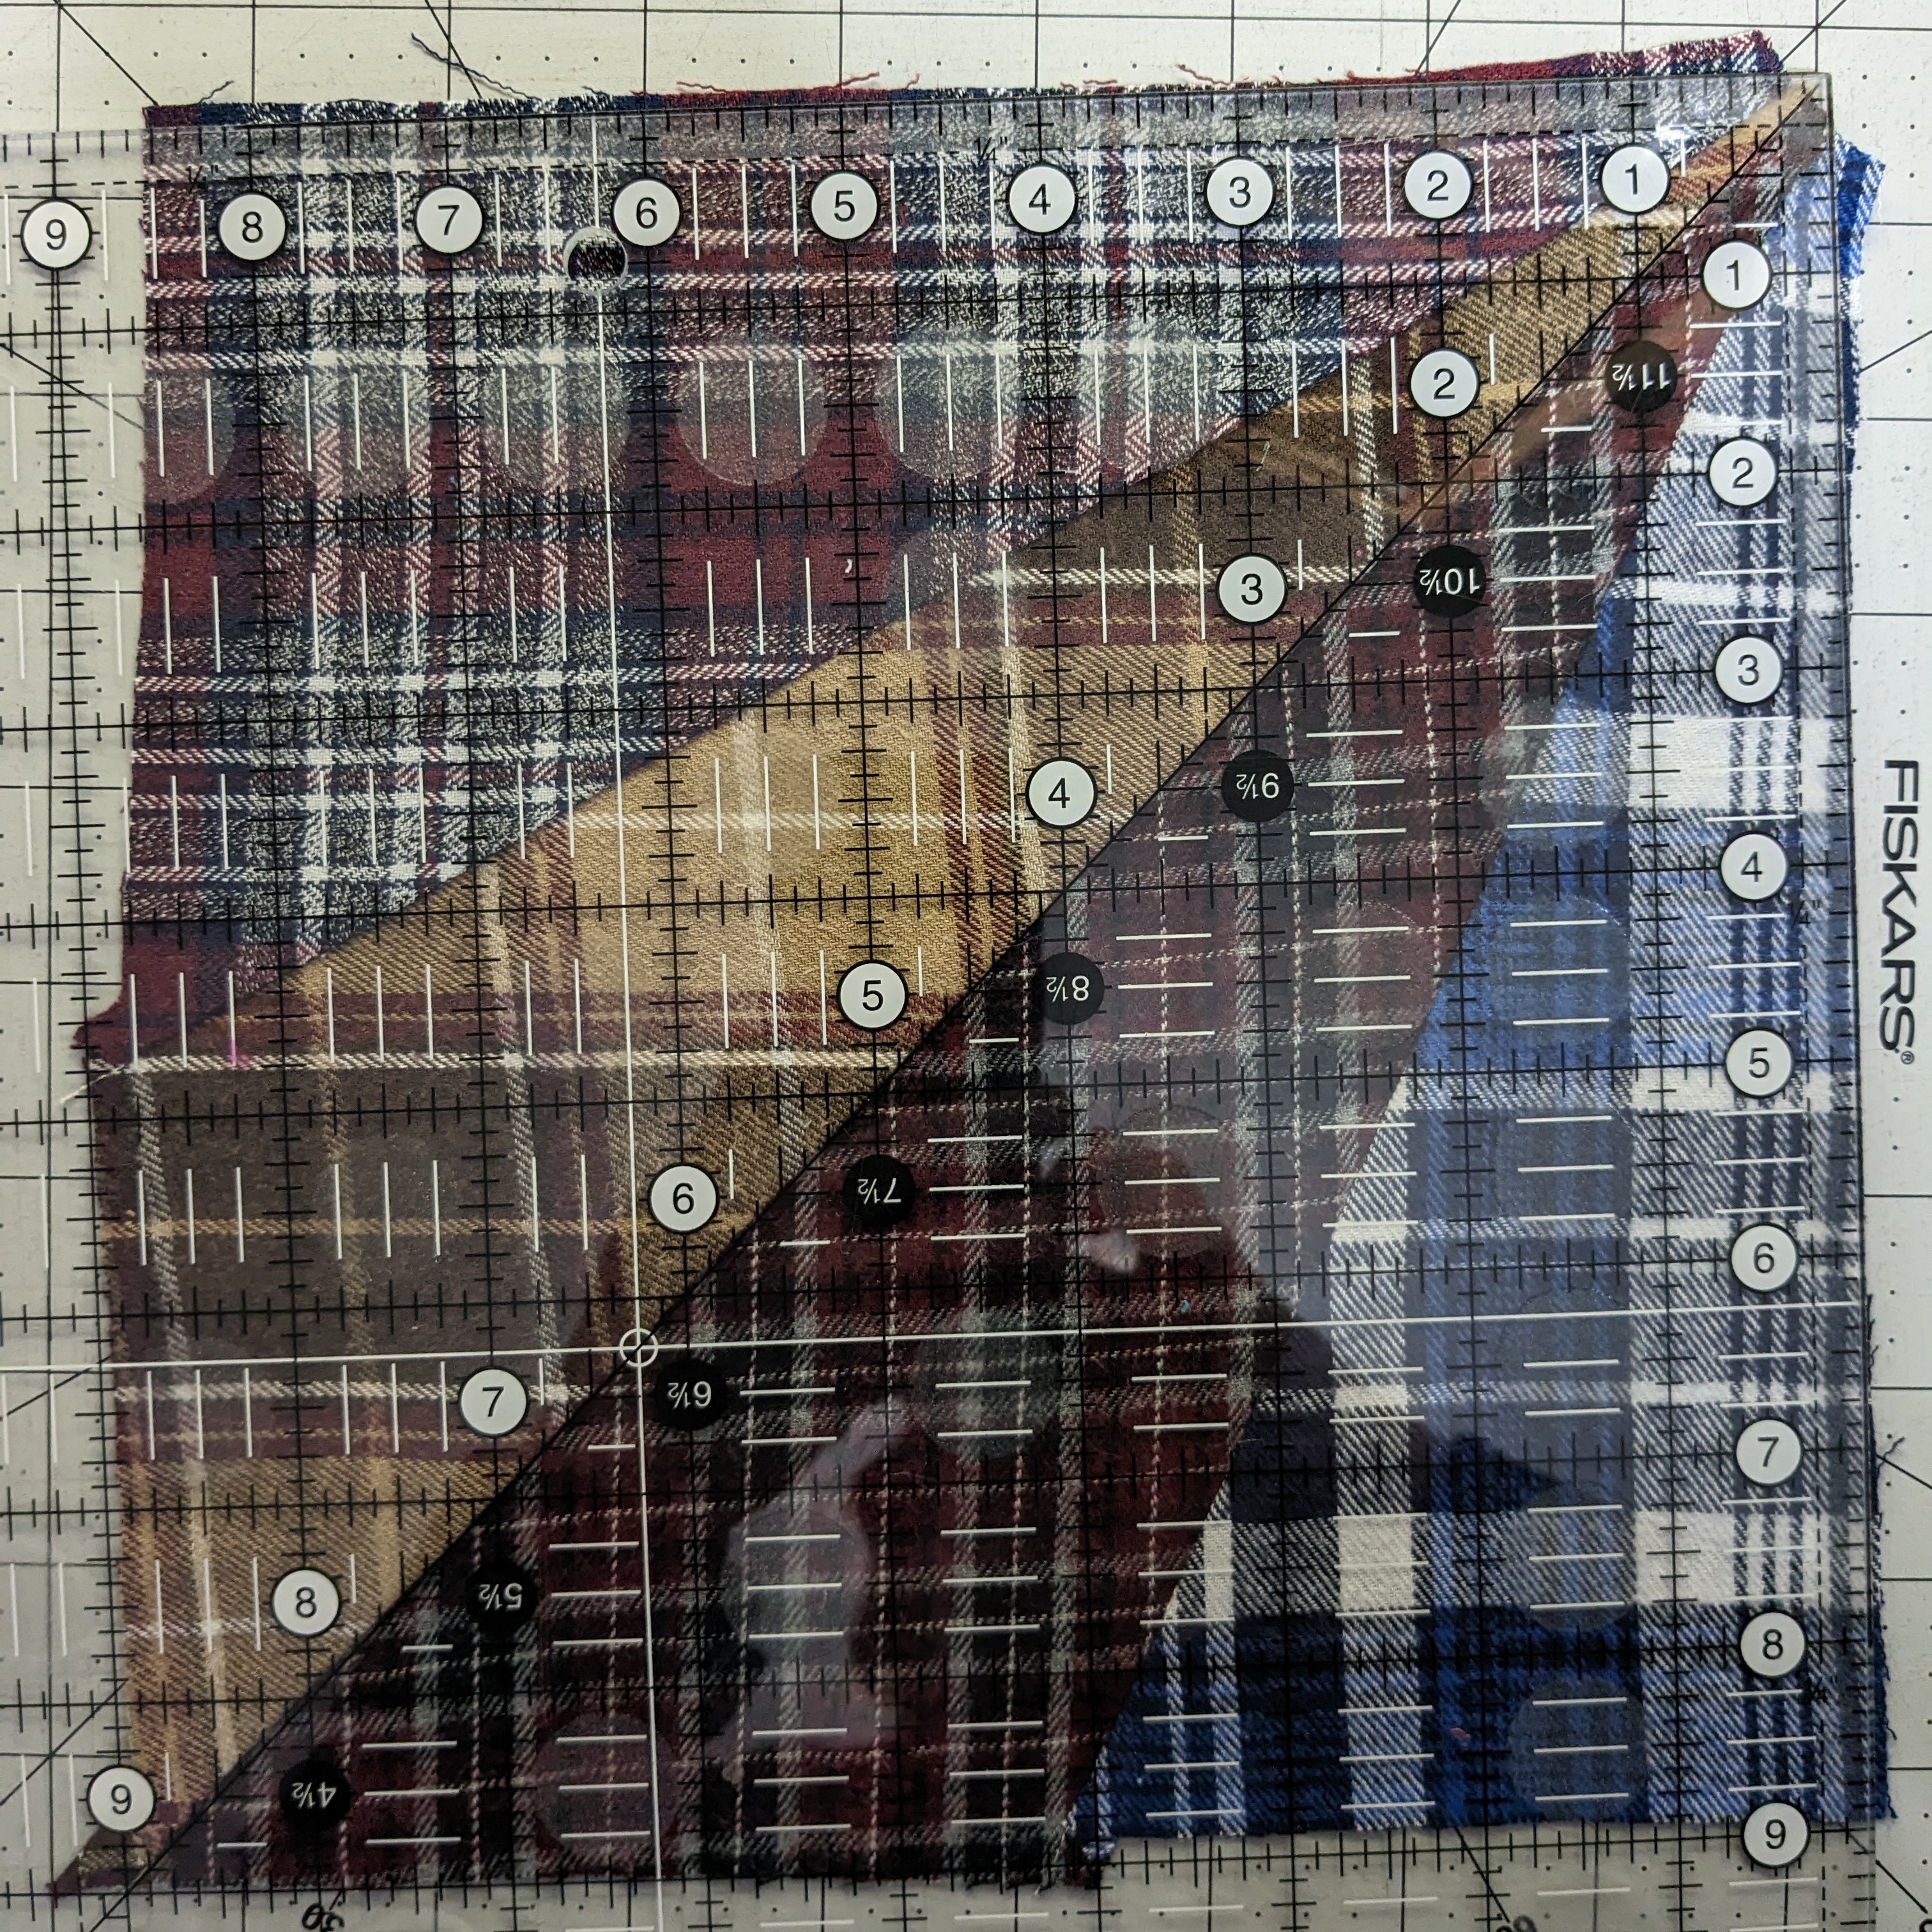
All four wedges were cut on the bias, plus the flannel fabric had a bit of stretch causing some distortion to the blocks. In effort to square them back up for piecing into a 4-patch, I used the 45-degree line on my square block to align with the center diagonal line and trimmed only the two outside wedges which would be pieced next.
A wooden clapper was used with pressing to help the center seams lay flat.

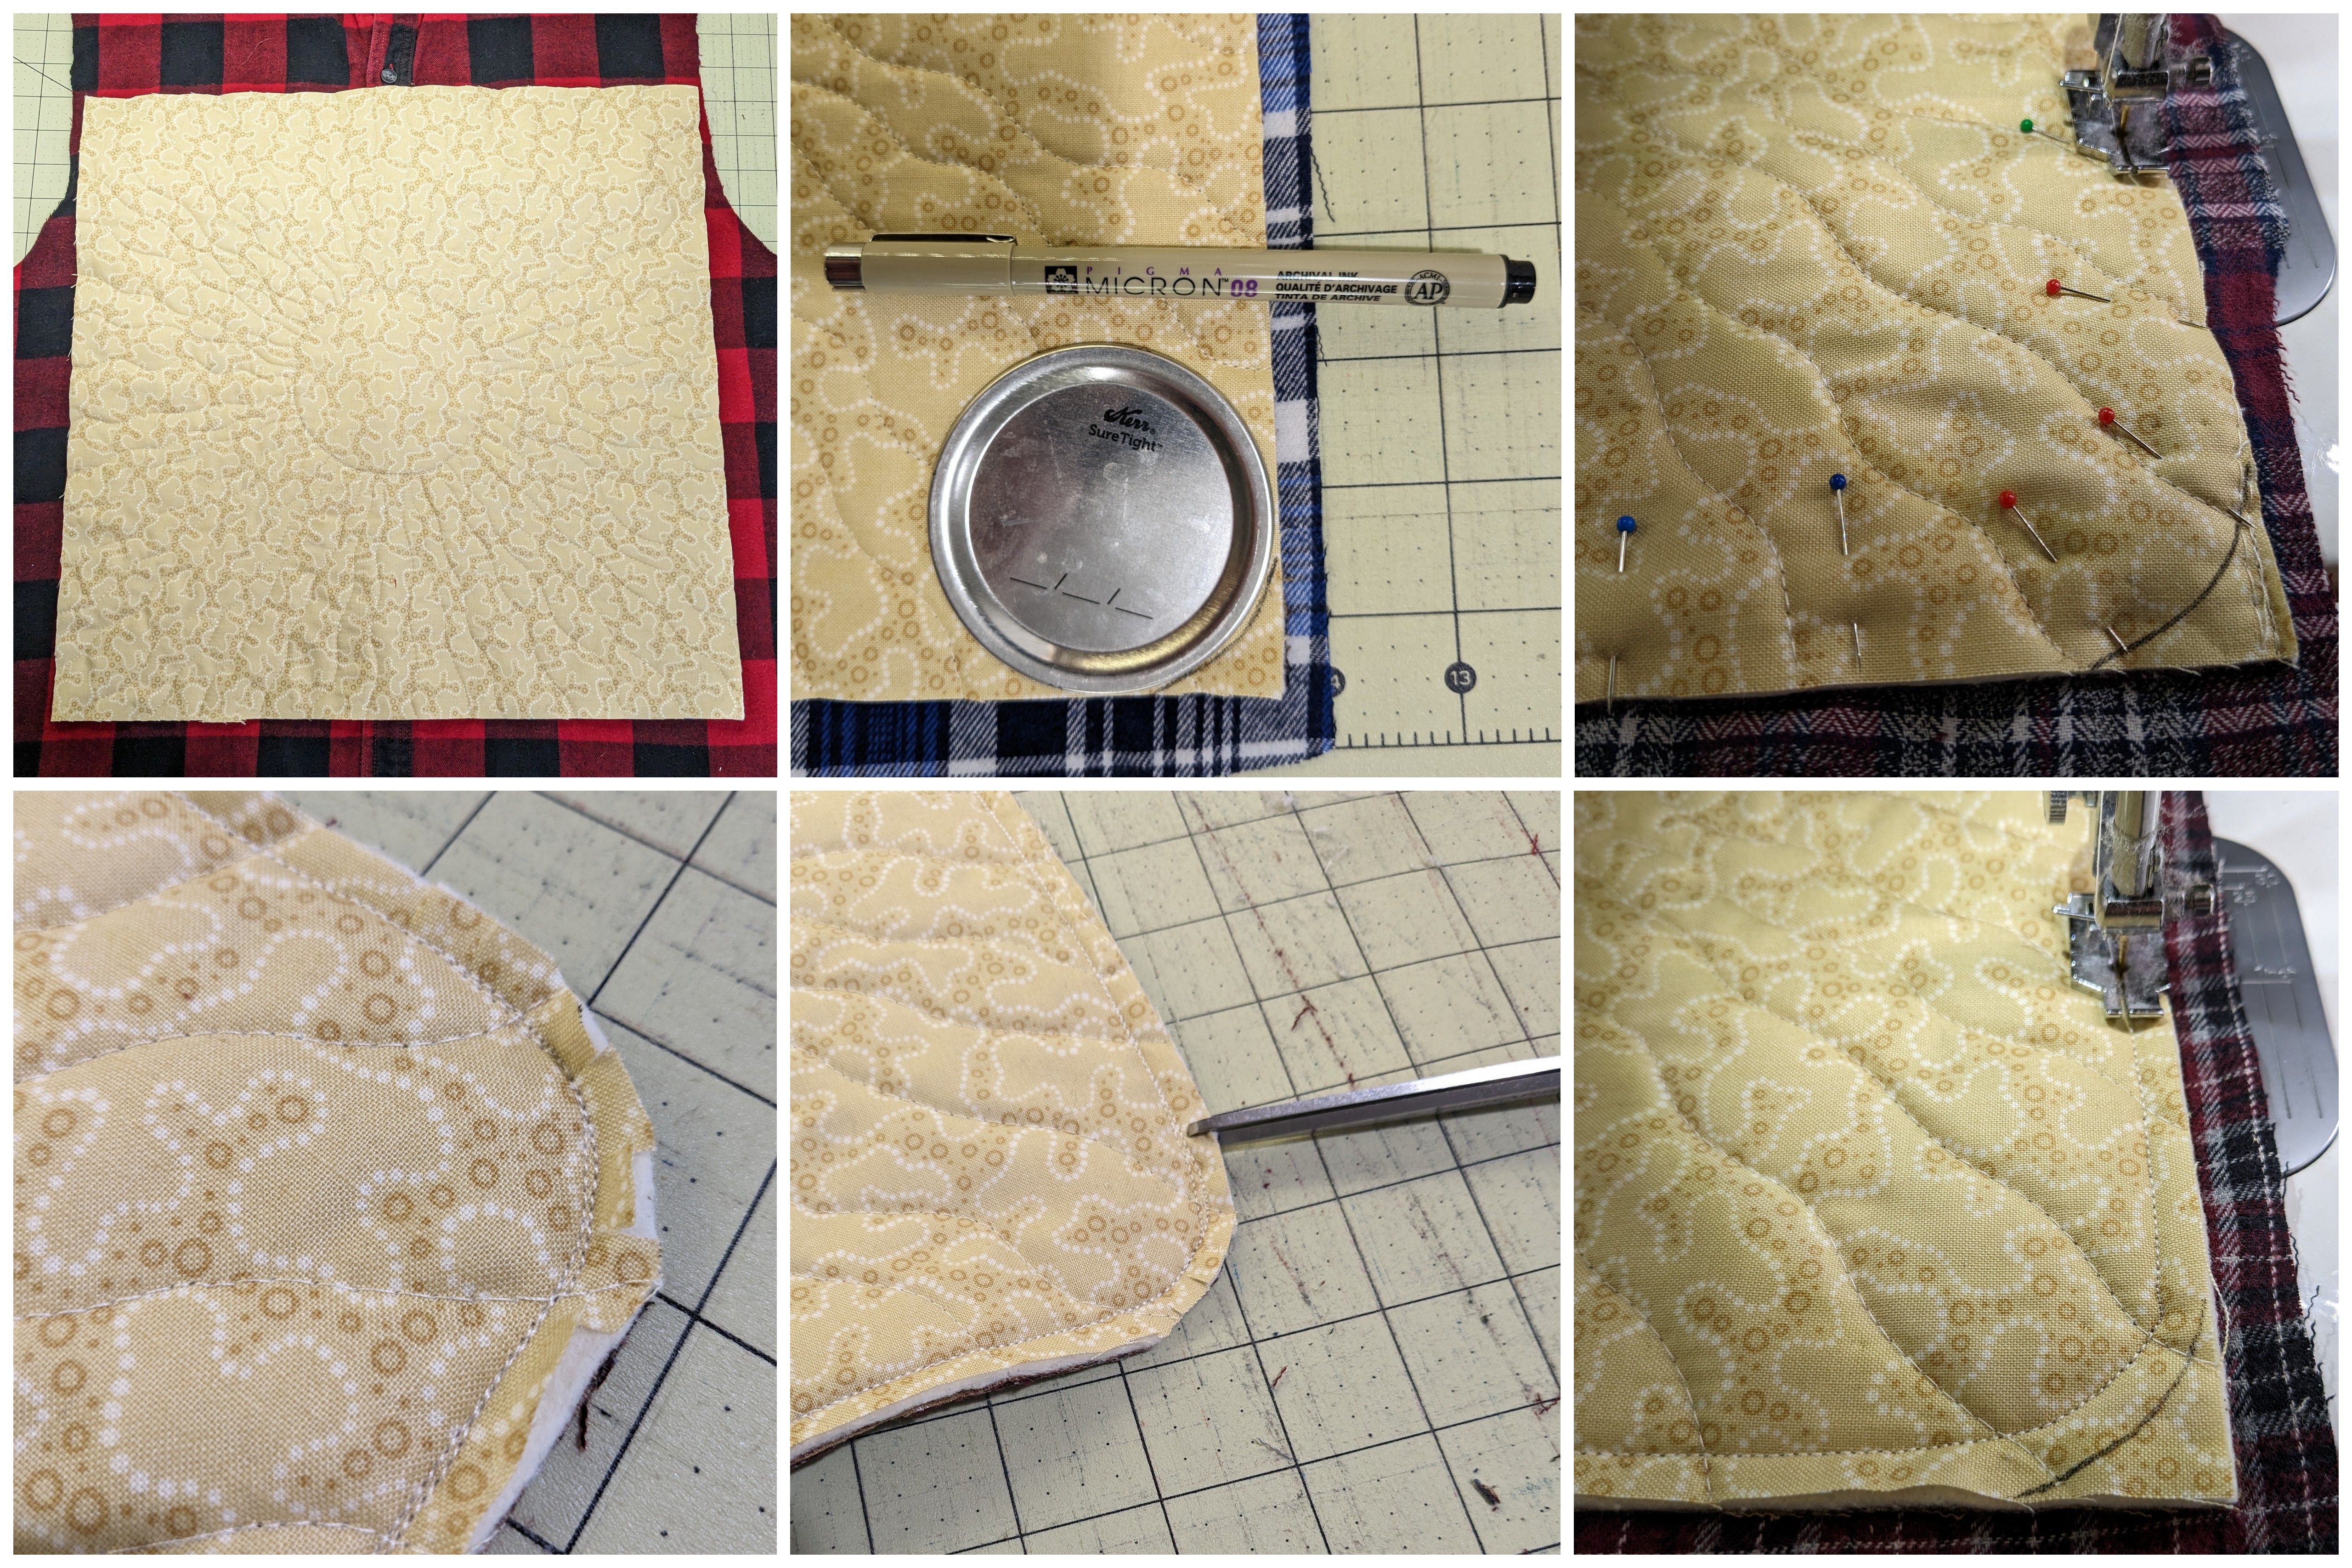
Two of the flannel shirts were set aside for use with a central applique design. Here they are folded to audition size and scale in comparison to the pieced background.

The red and black flannel was perfect for creating small hearts. A paper heart template was cut out of a scrap of paper to capture four color quadrants in each heart. The flannel was layered over a slightly larger rectangle of lightweight fusible interfacing (glue side up), and pinned with the heart template centrally positioned for outline stitching. After completing two passes of stitching, any excess fabric beyond a scant 1/4" seam allowance was carefully trimmed away and care was taken to cut a top notch up to, but not past the stitching, as well as clipping off the bottom tip.


A circular frame was cut out of paper to audition circle backgrounds using the remaining white and grey flannel shirt.

Once a section was selected, I was able to center my heart and fuse it into place for topstitching.


The prepared circles were then stitched into the center of each pieced block before layering with batting and a backing fabric for quilting.

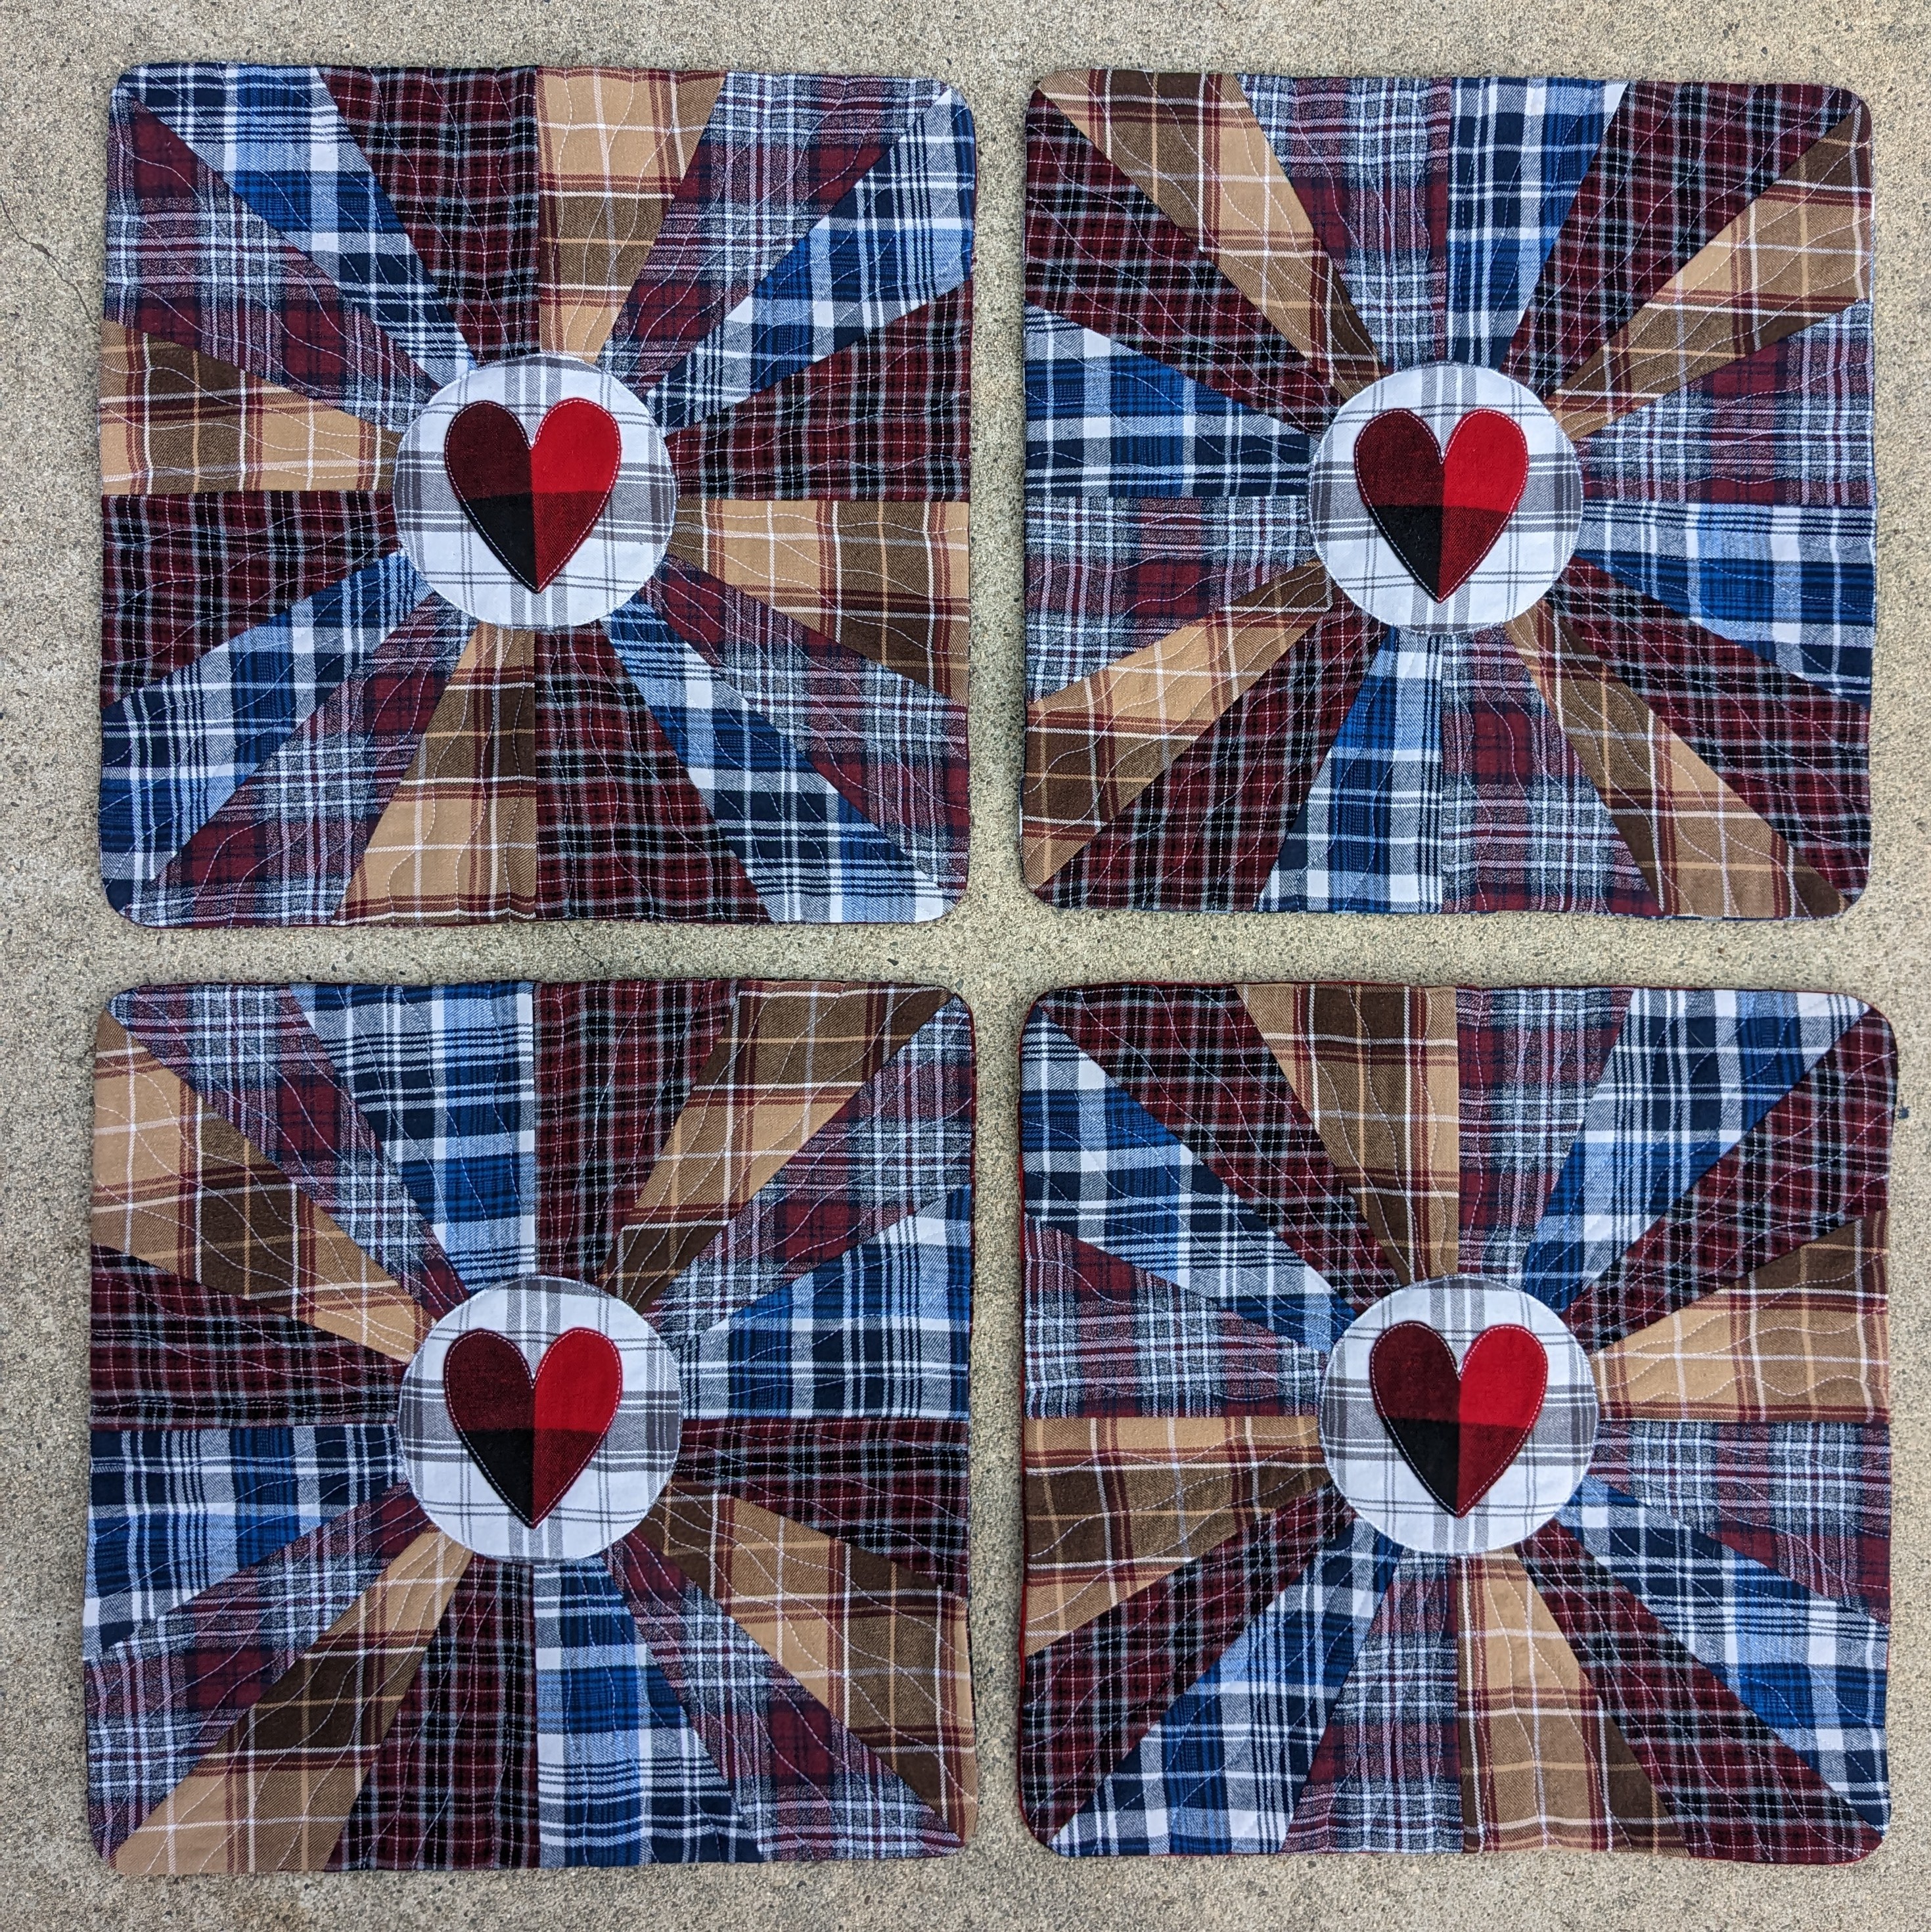
Initially I drafted straight lines radiating out from the center circle, but opted for wavy lines which would be more forgiving and would offer a contrast to all the straight plaid lines. Once the quilting was complete, the panels were trimmed square.

It was an honor to be entrusted with these cherished memories. I am really pleased with how these four pillows sparkle with the flannel plaid fabrics. They have been shipped and were well-received by the family.


Mel, I love your design and execution of the memory pillow covers for your friend and her family. The wedges and the quilting and the center heart give a celebration-of-life feeling to the project. Although our dad has been gone for nearly 30 years, I think my sisters would appreciate a similar reminder/memory but made from his ties which are the only clothing items I kept. Thank you for sharing this with us.
ReplyDeleteThank you Kath...It was an honor to be entrusted to create this project for a very dear friend. I definitely see this design translated into other clothing and love your ideas for using ties! So many options for personalizing with the various garments worn by our loved ones to have a piece of their life close by for comfort and memories.
DeleteMel, This is wonderful. A friend of mine's husband died recently and I told her I'd love to make pillows out of his favorite shirts for she and the kids. She thought it was neat but she wasn't ready to part with any of his stuff. So I'll wait.
ReplyDeleteThank you Lynda. I am so sorry for your friend's loss. She is lucky to have a caring and talented friend ready to make pillows in his memory...when ready!
DeleteThank you for sharing the step by step process you used, What a wonderful keepsake for this family. I will keep this in mind.
DeleteI'm so glad you enjoyed reading more about my process to create these memorial pillows. I see lots of possibilities to use a range of personal clothing and items to customize.
Delete