
This week's Project Quilting challenge had us Mining for Diamonds; Inviting participants to use the diamond as inspiration for our one-week challenge entry.
1. Crystal

2. Carving

3. Color

A few pops of color were introduced through Gelly Roll Moonlight pens after first testing on a spare print.
Once the pen marks were heatset with a hot, dry iron, a navy Isacord thread was used to free-motion outline the various stamped elements and a dense zig zag border fill.
4. Cut

Earlier in the week, I carved an Artist Tjap for use with my quilt finishes. While I had intended to stamp it on the frontside, I confess that I totally forgot until after the quilting was complete. Instead, it was stamped on the quilt label which was fused to conceal the slit on the backside.


It was fun to layer mark-making techniques with free-motion quilting using all the supplies below...
for a fun mini quilt finish...
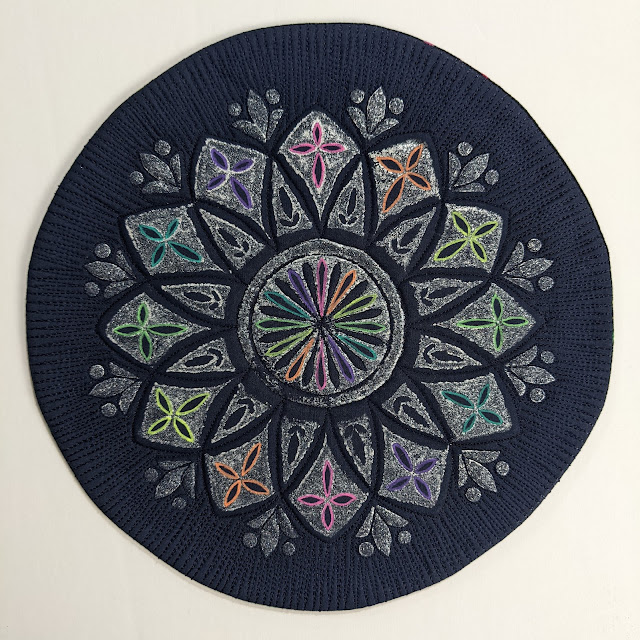 |
| "Bling It On" Finishes 9" in diameter |
"No pressure, no diamonds."-Thomas Carlyle, Scottish Philosopher
This quote seemed especially appropriate for this week's Project Quilting one week-challenge. Be sure to check out all the diamond-inspired entries made this week for Project Quilting's Mining for Diamonds challenge!
Really cool. I love how this works and enjoyed seeing your process.
ReplyDeleteThanks...it was fun to combine some of my favorite techniques to create this mini quilt. Glad you enjoyed learning more about the design/construction process.
DeleteVery pretty. Love the process pictures.
ReplyDeleteThank you!! I had a lot of fun adding the layers using my favorite techniques!! Glad you enjoyed it too!
DeleteYou've done it again! Amazing piece!
ReplyDeleteThank you...I finally managed to work small for a weekly challenge. Usually they keep getting bigger and bigger. Phew.
DeleteLove that you share all of the most important pointes for your artwork - and the supplies that work for you as you play and create. And suggestions to "try on a scrap first" - so important. This is one awesome little a piece of pretty fine ART!
ReplyDeleteWOW great job. Its amazing what you come up with
ReplyDeleteAwww...thank you Carol. These 1 week challenge themes nudge me out of my comfort zone as they inspire me to explore all new themes and techniques. Glad you are enjoying my takes on the challenges.
Delete