Most Project Quilting seasons include one weekly challenge theme inspired by a traditional quilt block. This week's challenge invited participants to start and finish a quilt project inspired by and use the traditional 54-40 or Fight block. This was a new-to-me quilt block, so I enjoyed learning more about its political history as well as studying the various units that made up this block.
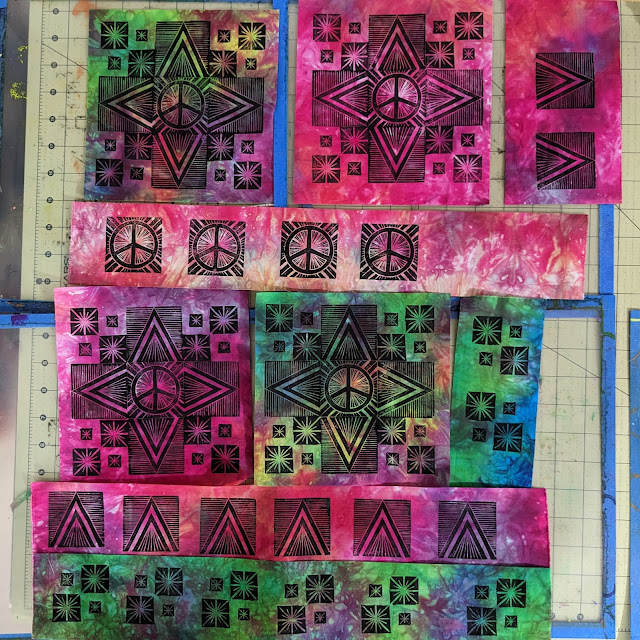
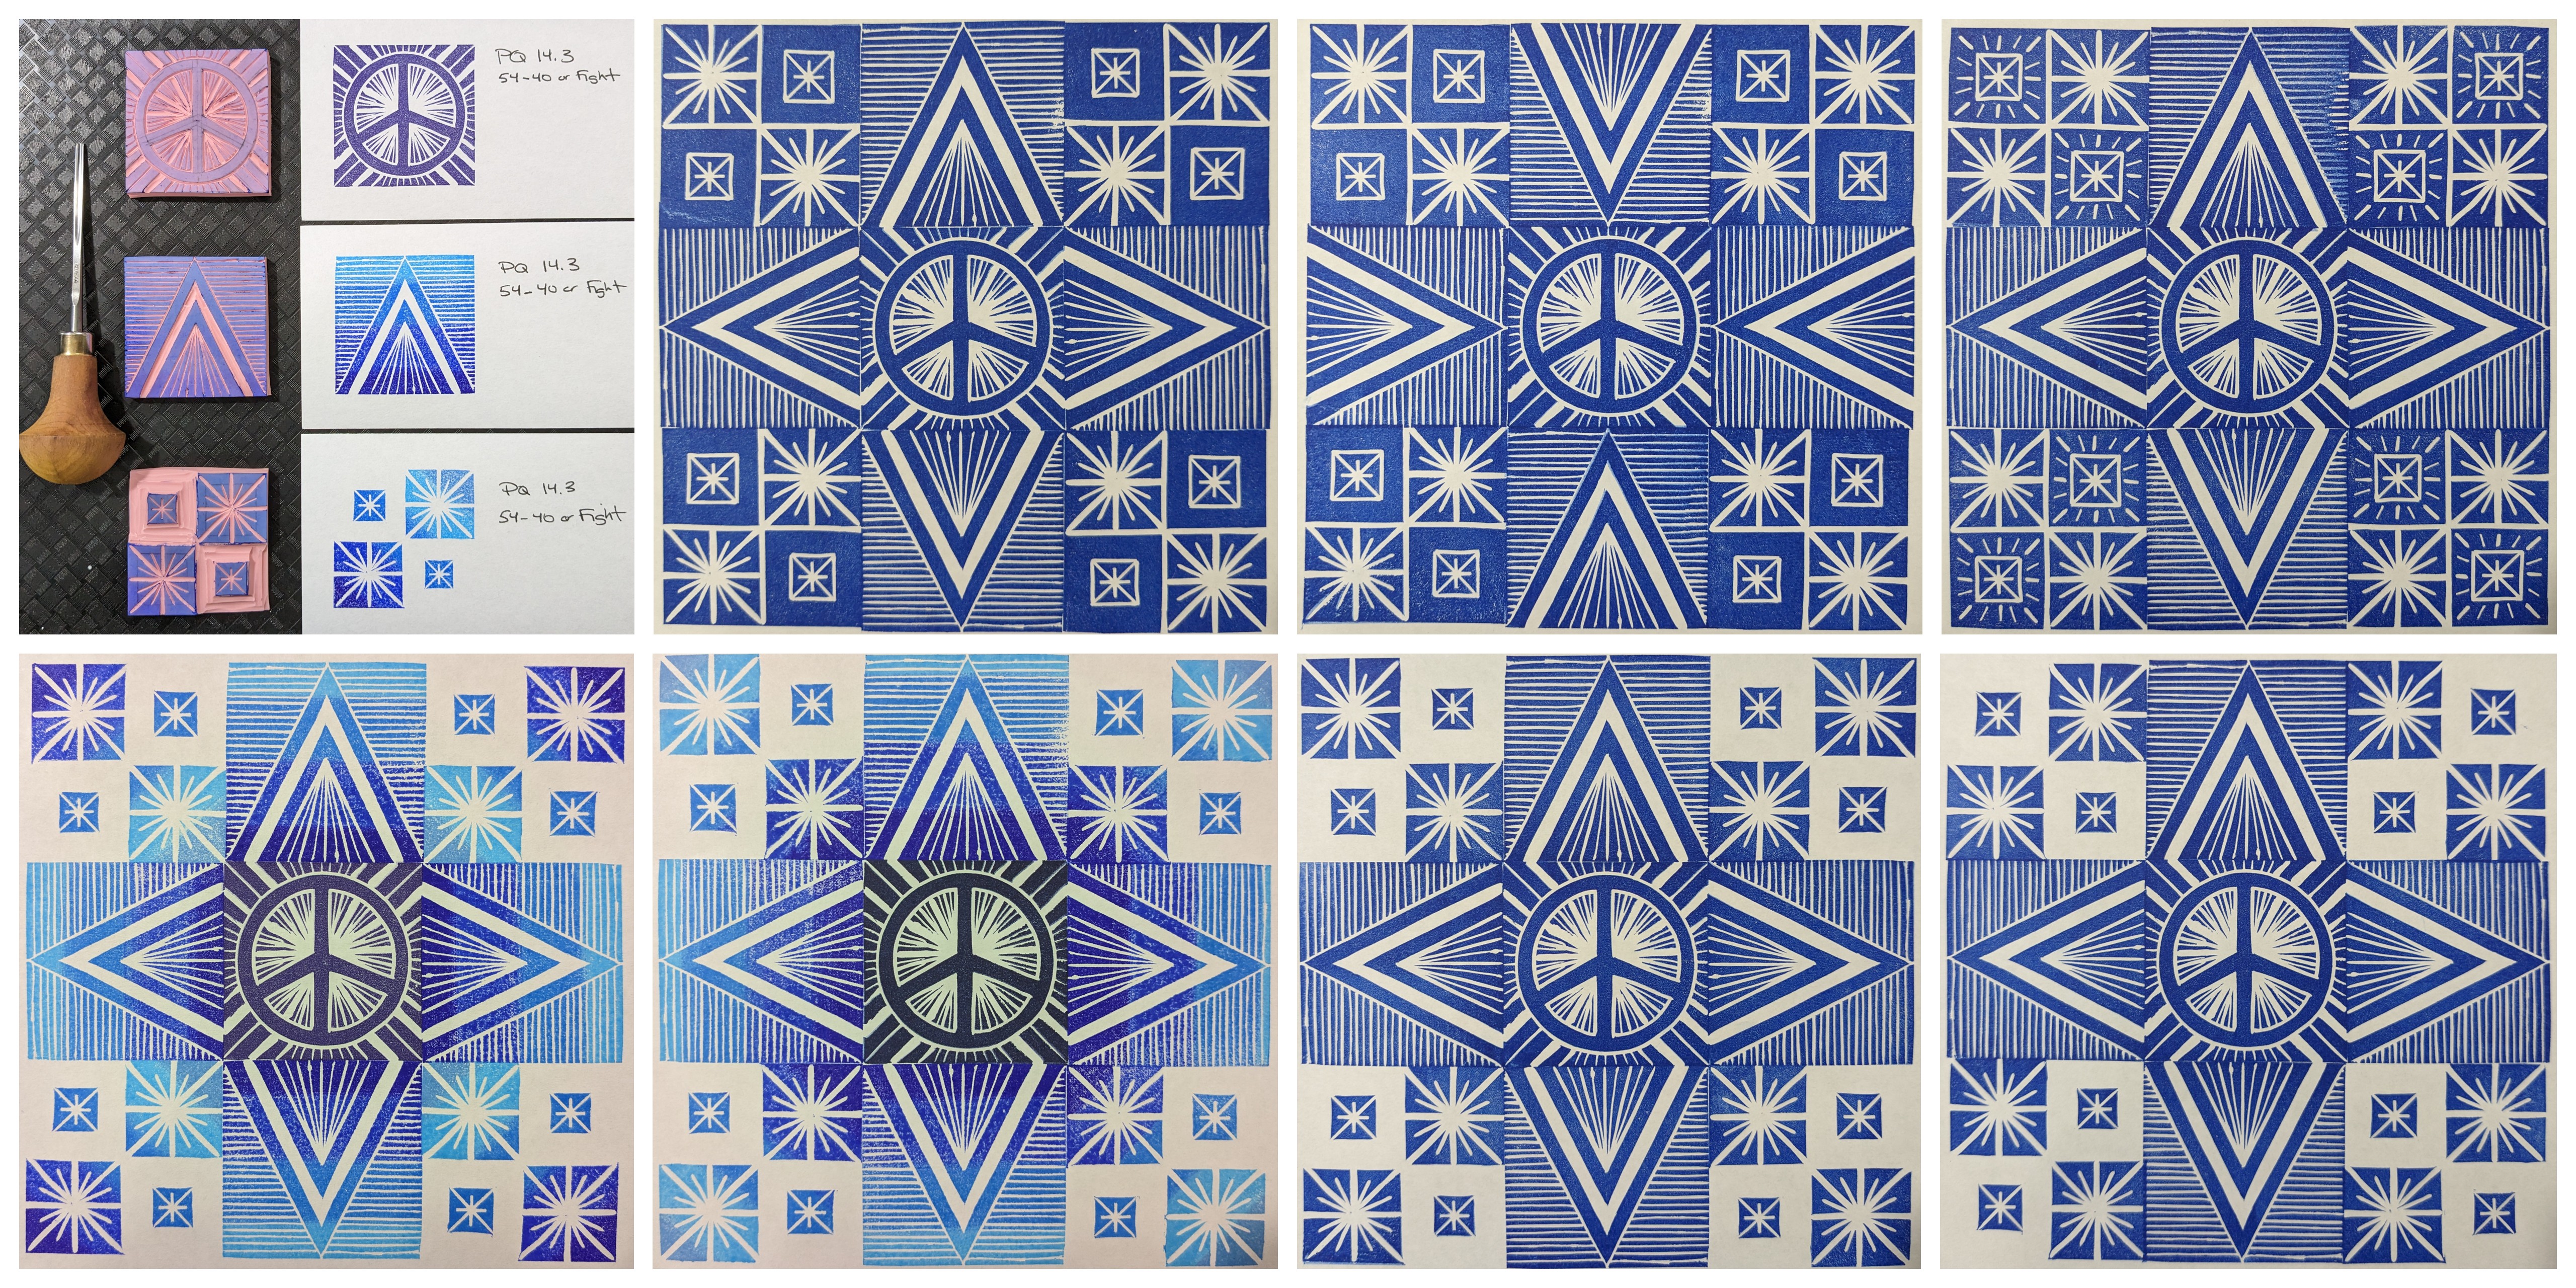
Instead of piecing one or more blocks, I turned to block printing! Three new 2" square block prints were carved to print out a 54-40 or Fight quilt block. Initially I printed onto paper to refine the design which included playing with the orientation of blocks, lightening up the 4-patch corner design, and printing with my new Blue Breeze Kaleidacolor raised rainbow dye inkpad.
I knew my next step was to print this design onto fabric but I wasn't quite sure what would come next. While warming up for yoga here in my studio, I looked up at my growing collection of mobiles when I pictured a mobile of floating block elements that would twirl to form the 54-40 or Fight block design. When I shared this idea with my yoga partner, she suggested the addition of a cubed elements. Below is my very rough sketch and notes on the individual units needed to construct this vision.
Instead of fighting, I was hoping to channel peace throughout my project, so I turned to my collection of hippie hand-dyed fabrics to find this one great panel and paired it with a cherished Michael Miller prints with tiny peace signs for use with some of the 3-D interior sections.
The next step involved combining two of my loves: block printing and hand dyed fabric! I didn't think hand dyed fabric could get any better, but wow these block printed, hand-dyed fabrics sparkle!
I recorded a short
time-lapsed video of me block printing with black acrylic craft paint applied using a foam dauber/pouncer. Once the paint was dry, I heat set it with a hot dry iron. It was then layered into sandwiches with Pellon 987F Fusible Fleece to add some dimension once quilted and Pellon #50 Heavyweight Stabilizer for structure. Multiple threads were auditioned before I found two amazing metallic threads that added a little sparkle without detracting from the printed fabrics. Unfortunately, this was a new-to-me metallic thread and despite lots of troubleshooting using the video tips suggested by the thread manufacturer, it continued to result in lots of shredding and frustration. I loved the sparkle and switched back to my preferred metallic thread by Superior to complete the remaining quilting and thankfully only experienced one small thread break which was actually in the bobbin and not the metallic thread.
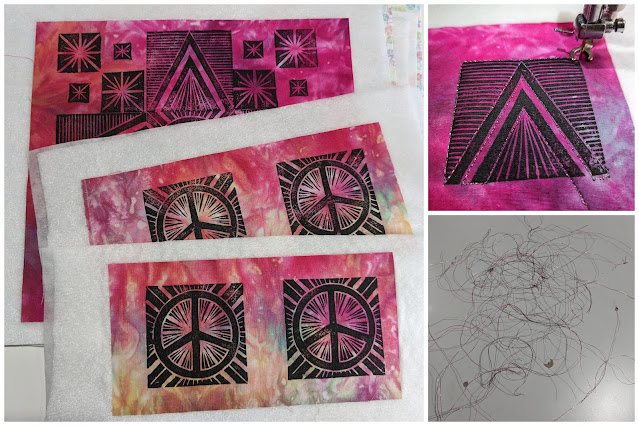
The smaller floating units were all trimmed before painting the edges with black Tulip dimensional fabric paint. As the units would be twirling in the air, I needed to recreate the design onto the backside so the block could be completed when viewed from different sides. Since I was running short on time to finish my project, I opted to stamp the backside with Tsukineko Memento Luxe inkpad, specially formulated for use on fabric and mixed media. To heat set the ink with a hot dry iron, each unit was placed into a parchment sandwich to protect both the paint and my iron.
To form the cubed elements, I planned to connect the quilted panels with zig zag stitching, which required the use of my Brother Innova 450Q (as my Juki primary machine only has straight stitch capability). The edges of each panel were prepared with 3 rounds of stitching:
- The first pass was a simple top stitch ~1/8" from the edge to reinforce the edges.
- The next pass was a narrow satin stitch (2.5 stitch width/0.4 stitch length) which came right up to the topstitched perimeter.
- The last pass was a slightly wider satin stitch (3.0 stitch width/0.4 stitch length) which filled in any gaps in the stitching for a really nice finished look.
At least now I had a finished 54-40 or Fight project (4 of them!) that could be linked up if I ran out of time or couldn't figure out the 3-D elements.
A less dense and skinnier zig zag stitch was used to stitch adjacent panels together, creating hinged sides.
Hmmm...perhaps I should stop here and enter my stylish quilted hat?!?
Tempting, but there was still another 3-D element to create, which had me especially nervous as this one would have 6 quilted sides to assemble and might not be as forgiving. I made sure all 6 panels were trimmed to the same size and took care to minimize any distortion while satin stitching the edges. Instead of pins, wonder clips were used to hold the two edges together and prevent any shifting. Nearly all (9 out of 12) sides were connected by machine, with exception to the last three on top. I attached the twirling units above and below before filling my little cube with stuffing and 2 jingle bells. The remaining 3 seams were securely closed with hand stitching.
A map of the floating elements was laid out to ensure order and orientation when assembling the 54-40 or Fight block design. The individual strands came together fairly quickly thanks to the hand stitched and beaded process I finetuned while making my prototype wind chime for the
PQ 14.1 First One challenge.
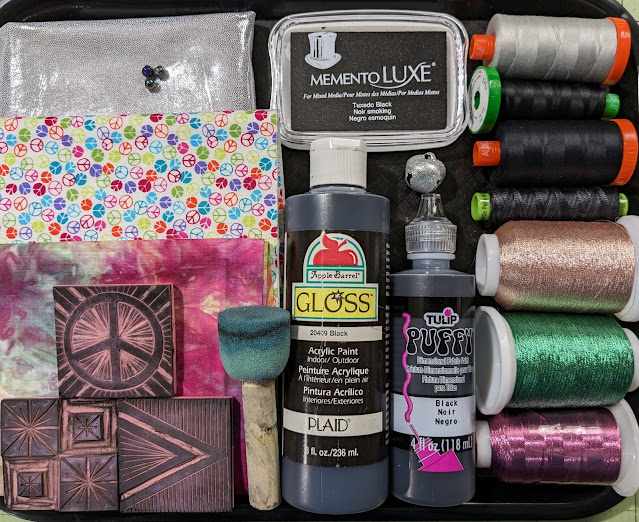
The next new learning curve involved attaching the center strand to the top four corners of the larger lantern shape and back together into a hanging loop. I made great progress until one of my strands tore just as I was getting ready to tie the final loop! I tried to fix it and created a big knot in the center and ultimately had to cut everything out and start again. This time I called my partner Doug into the studio for an extra set of hands. This step required quite a bit of focus and persistence, so I didn't capture any process photos of the process, but here are nearly all the materials and supplies used for making this project (fusible fleece, stabilizer, and filling not included).
While researching title ideas, I found this quote:
“There is peace even in the storm”
― Vincent van Gogh
The next morning I woke to a boom of lightning followed by some pretty heavy rain, which posed a challenge for photographing my finished piece. Thankfully there was a lull in the rain to do a quick outdoor photo/video shoot. I hope you will check out the video and accompanying audio to better appreciate of how the various elements dance and twirl to form the block design, while the center peace block remains fairly calm and steady. Wishing you all "Inner Peace."
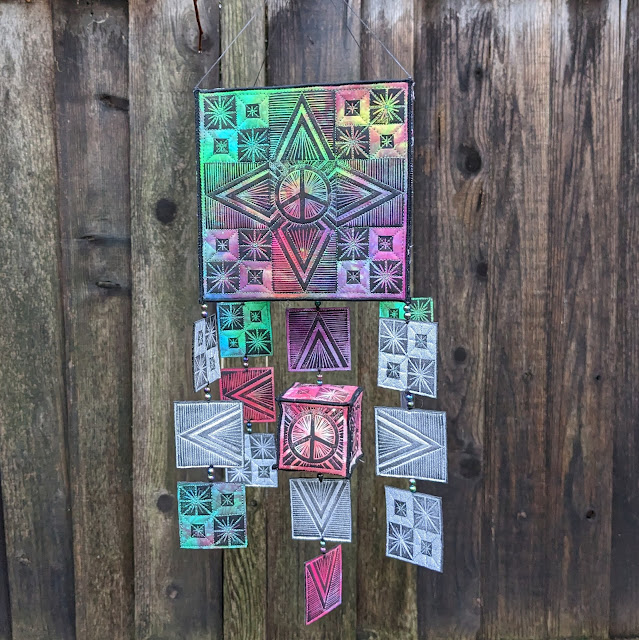 |
| Inner Peace, Finishes 26" tall and 11" in diameter |
Be sure to hop over to see all the incredible 54-40 or Fight projects created for this week's Project Quilting challenge.


Very cool interpretation
ReplyDeleteThank you Dolores--these challenges really stretch my creative skills to explore all new construction and design possibilities!
DeleteI love the combination of block printing and dyed fabrics, and I especially appreciate that you captured the videos of your process and finish. Beautifully done!
ReplyDeleteThank you Yvonne--I'm really excited by the direction that this project took me! These prompts really stretch my creativity into exciting new directions. Glad you enjoyed the video which really captures the elements dancing and twirling!
DeleteThis is so cool! When I showed Capri what you made her jaw dropped! I have a feeling we'll be wokring on some print making this summer ;)
ReplyDeleteOooh--I am so delighted by Capri's jaw-dropping response! I am even more excited that print making is being considered for this summer! I will warn you both that it is super addicting, but an absolute joy! Let me know if you want any class/book/supply recommendations!
DeleteGreat hat, Mel!! LOL! Seriously, though... You created such an incredible project for PQ14.3!!
ReplyDeleteAww...I may need to revisit the hat idea for future PQ challenges. So glad you enjoyed the finished mobile as well!
DeleteWow! that is an utterly amazing piece.
ReplyDeleteThank you Kathleen for your lovely comment... I'm so glad you enjoyed this moment of peace!
Delete