
 |
| Mel, Age 5, First Day of School |
Welcome to my stop on the 2019 Back to School Blog Hop! That's me pictured above, excitedly awaiting my first day of Kindergarten!! Fast forward 35+ years, and here I am giddy with excitement about participating in my very first Blog Hop!!
I've always loved back to school shopping and stocking up on all the essentials for a successful new year of school: a new pair of Buster Brown shoes, lunchbox and thermos, composition notebooks, #2 pencils, pristine box of Crayola crayons, and Elmer's School Glue. While my school days are long gone, I still stock up on bottles of Elmer's School Glue each Fall, to use in my quilting studio. 

Before I delve into how I use school glue with quilting, how about a quick primer in Elmer's School Glue...
- In 1968, Elmer's introduced Elmer's School Glue, the first white glue that washed out of clothes.
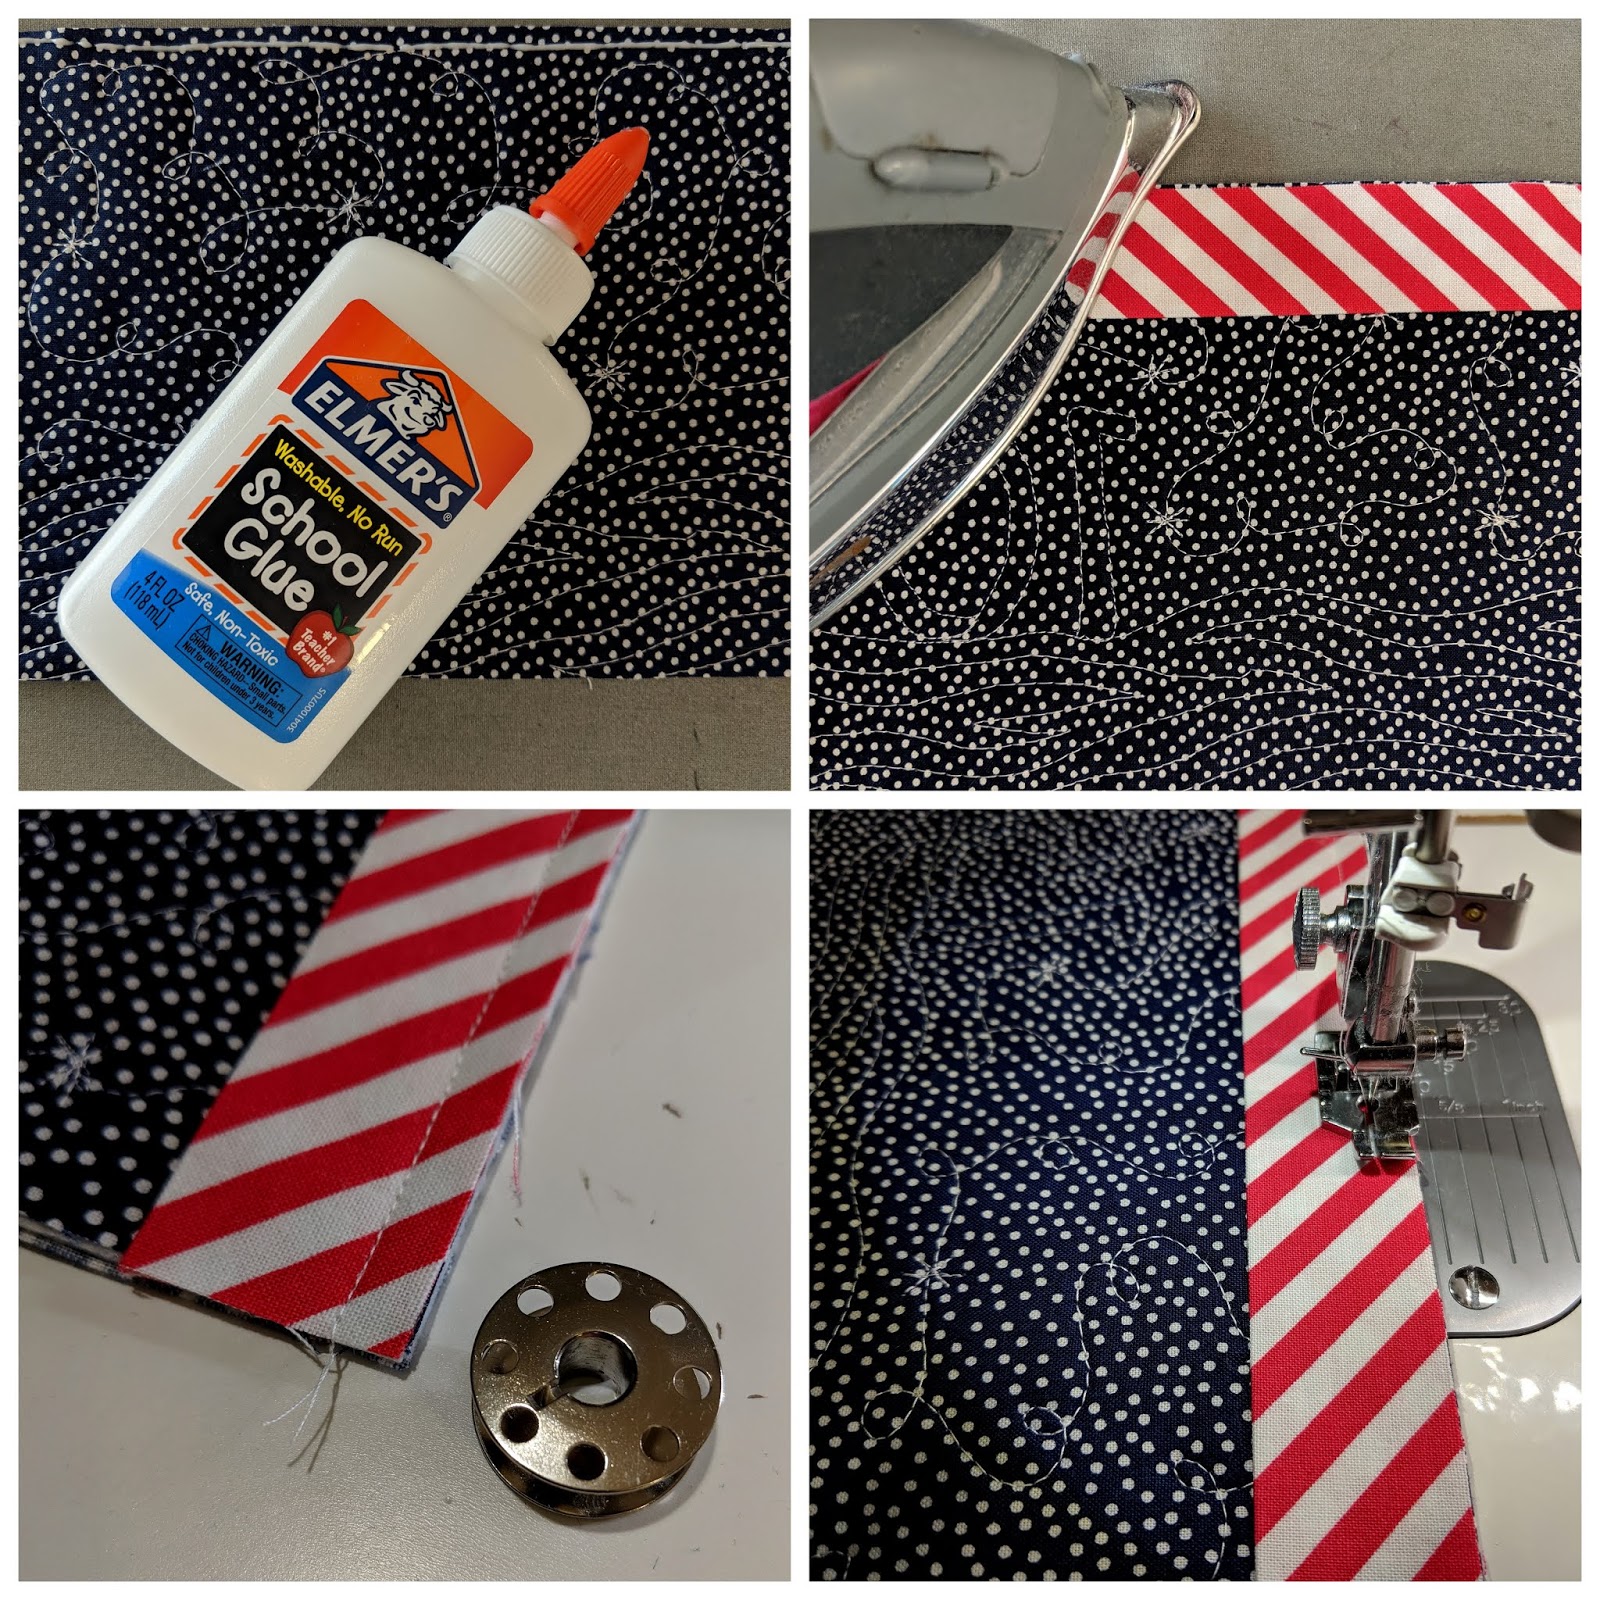
- It's easy to use! Each bottle comes with its own applicator so you can apply a fine bead/line of glue to your quilting projects. Fine tip applicators are available for purchase if you tend to be a bit heavy-handed. Use a hot, dry iron to heat set for a temporary bond. If needed, you can reposition the fabric as needed with another dab of glue and heat setting. And since Elmer's School Glue is starch based, it helps to stabilize your project, minimizing stretching and distortion, especially along bias edges!
- It's safe! Not only is it non-toxic, but safe to stitch through on your sewing machine. I try to use a small line/bead of glue just inside the seam allowance and make sure I heat set before stitching on my sewing machine.
- It washes out with water! Not planning to wash your project entirely? You can use a damp washcloth or toothbrush dipped in water to remove any stray bits of glue residue.
- It's inexpensive! During back to school shopping, it is often on sale ($1 USD for two bottles=Bargain!!) Trust me, you'll want to spend a few dollars stocking up once I share my 5 Reasons to Say Woo Hoo to Using School Glue.
Ok--now that you know what makes Elmer's School Glue so special, it's time to apply it to our quilting projects...

* A Few Words of Wisdom: Please note that I am using Elmer's School Glue. Elmer's manufactures a variety of glue products, some of which may work in a similar manner. Likewise, School Glues manufactured by other companies may yield different results. If you opt to use a product other than Elmer's School Glue, I encourage you to test, test, test!!
Application #1: Matching Up Motifs
 |
| Attention to Detail |
Taking the time to match up motifs in a pieced seam is a fantastic detail that is sure to impress! Make the process even easier with Elmer's School Glue.
 |
| Prep and Align |
Match up two pieces of fabric with overlapping motifs. Turn one edge under 1/4" and press with iron. Apply a small bead of glue to the turned under edge. Place the pressed under edge to align with the motif and heat set with a hot, dry iron.
 |
| Stitch and Voila! |
Stitch along the crease line and trim away any seam allowance in excess of 1/4". Voila!
Application #2: Applique
Use a small dab of Elmer's School Glue to glue baste your pieces into place for your favorite applique technique including Bias Tape Applique, Top-Stitched Circles, and Top-Stitched Improv Curves.
 |
| Bias Tape Applique |
 |
| Top Stitched Circles |
 |
| Top Stitched Improv Curves |
Application #3: Pin-Free Construction
A. Stabbing myself
B. Breaking a needle because I forgot to remove a pin
C. Having a pile of warped pins
D. All the Above.
Swapping out pins for a spot of Elmer's School Glue helps me manage multiple layers and achieve precision without all the adverse side effects.
 |
| Managing Awkward and Bulky Layers |
 |
| Glue Basting Flanges |
Application #4: Binding/Facing
A few years ago, a friend loaned me Sharon Schamber's Perfect Straight Binding DVD (which is now available to watch on Sharon's You Tube Channel). Sharon is an award-winning quilter and uses Elmer's School Glue to bind her quilts. The glue helps stabilize the edges, so you don't end up with wavy edges. Regardless of whether you finish your binding by hand or by machine, I encourage you to watch Sharon's tutorial and give Elmer's School Glue a go!
In a nutshell, once you've prepared for your binding strips, place a small bead of glue along the edge of your quilted top (within the 1/4" seam allowance), position your binding strip with raw edges out, and heat set with a hot, dry iron. Stitch and repeat on all 4 (or more) sides of your quilt.
 |
| Binding By Machine Part 1 |
Once you've stitched the binding along the perimeter of your quilt and pieced together the two tails, it's time to press and glue baste on the reverse side. I like to press all sides to set the stitches, and then press the binding open on each side using a little Maryellen's Best Press. Turn quilt sandwich over and give each edge another press. Use fingers to wrap binding over the edge and into place. Follow with a hot, dry iron to crease the binding. Squeeze a thin line of glue just inside the stitched seam allowance and tap binding back into place and heat set with iron. Finish with top stitching on a machine or hand stitching.

Application #5: Finishing Touches-Labels & Quilt Sleeves
I am a big advocate of documenting each quilt finish with a label as a way of recording important details including: title, reference to any patterns/workshops involved, recipient, finish date, and most importantly, the maker's name and location. Sometimes I use fusible interfacing to make my label and find the glue dots don't stick well (or perhaps I accidentally assembled my label with the glue dots facing into my label!), so Elmer's School Glue to the rescue! Place a thin line of glue onto the back of your label, avoiding the edges so you don't have to hand stitch through the extra layer of glue. Turn label over, position into place onto the back of your quilt, and heat set. No need for pins that are likely to snag your thread as you hand stitch your label.
 |
| Quilt Labels |
I am also a big proponent of entering your quilts into Quilt Shows (guild shows, county/state fairs, regional exhibits, and/or national venues). Most quilt shows require a quilt sleeve for their hanging process. Prepare your quilt sleeve making sure you allow the proper width required by the venue. Once your sleeve is prepped, ditch the pins, and glue baste into place prior to hand stitching.
 |
| Quilt Sleeves |
Thanks for joining me for 5 Reasons to Say Woo Hoo! to School Glue. I hope you Woo Hoo'd at least once during this post, and are inspired to add Elmer's School Glue to your quilter's toolbox. Pssst...Be sure to stock up while Back to School sales are still in effect! It also comes in gallon sized!!
 |
| Stocking Up on Elmer's School Glue for the Studio! |
Continue the bond and sign up to receive my monthly newsletter, packed with quilting tips and inspiration from my studio delivered right into your email inbox.
And there's lots more quilting tips and tutorials lined up for the month-long Back to School Blog Hop 2019! You can catch up on previous posts and follow along for many more posts to come.

Special thanks to Sam Hunter, of Hunter's Design Studio for organizing and hosting the 2019 Back to School Blog Hop.

thanks! I am convinced to give it a try!
ReplyDeleteWoo hoo Cheryl!! I am delighted to hear you are ready to give Elmer's School Glue a try! It is one of my studio essentials!!
DeleteLove using school glue - I hoard it like fabric!
ReplyDeleteThanks Susan...Elmer's School Glue is right up there with 3-M Blue Painter's Tape...two of my quilting essentials! And I am glad I am not alone in hoarding it. For a while it was a real struggle to find it in stores thanks to the slime craze!!
DeleteI am a glue-aholic too. If the blood all over your quilt isn’t enough to make a person switch from pins, perhaps their dog trying to eat one is . Yes, I dropped a pin and was unaware. My little dog had this cunning thing going on in her mouth like a piece of dog food lodged between teeth. Upon further inspection I identified a pin stuck into her gums and a severely bent pin. Elmer and I are old pals and I keep no more than 3 pins on my table at a time. If one disappears I hunt it down until it’s found. Even if it means emptying the waste basket.
ReplyDeleteYay! Glue-aholics unite in our love of glue! Two more excellent cases for ditching the pins in lieu of glue. Eeek...I hope your dog was ok and quickly recovered from her pin injury.
DeleteThanks! I've been using school glue for a long time and never thought about using it for the hanging sleeve, duh. I also use glue sticks for a lot of things. Great blog hop.
ReplyDeleteI am delighted to hear you added a new use for School Glue...sewing up hanging sleeves is so much easier with out the pins to snag the thread tails!! I have a stash of glue sticks as well, but don't use them nearly as often. Maybe I need to revisit them and experiment a little for next year's Back to School?!?
DeleteThis would have helped with the Lone Star intersections. I hate basting them but I’ll try gluing them since repositioning will be so much easier. Thanks, Mel.
ReplyDeleteKnowing how you like to work in a series--I suspect there may be another lone star or two in your future where you'll get to play with some Elmer's School Glue!
DeleteThanks for the glue tips, I will try that on my next binding.
ReplyDeleteWoo hoo! It was a game changer for my binding and I hope you'll love using glue as much as I do!!
DeleteSaw your post on the Hop list and made a mental note to read it later. Went to town and ran errands, including one at Walgreen's. Stood in the store, staring at the school glue on the end of an aisle, and decided I should go home and read your article. Now that I have read it-you're terrific!--I sure wish I had bought a bottle (or 2, 3,. ..). Especially since I'm in the middle of a quilt sandwich. Well, back to town ;)
ReplyDeleteYay! I am delighted to hear you are going to give Elmer's School Glue a try!! I am just sorry it will involve another trip into town. While you are there, I recommend that you definitely stock up (as we have to compete against the slime craze that is still going strong which involves glue and can cause shortages as times!!) Happy quilting!!
DeleteGlue basting the hanging sleeve! That's a great idea! I feel like mine always shift as I stitch them down and the glue will stop that from happening. Thanks for an informative post!
ReplyDeleteWoo hoo!! The School Glue will definitely help keep your sleeve in place as you stitch it down. Thanks for visiting!!
DeleteThese are all great ideas! I am a sucker for school supplies and bought a whole bunch of glue. I use it for basting applique but will definitely try the others.
ReplyDeleteI love stocking up on school supplies, especially Elmer's School Glue. I hope you try out some of the other ideas and tips!
Delete